Would you like to allow your users to submit ratings in your forms? With the Rating field for WPForms, your users can select their rating from an easy to use set of images. In this tutorial, we’ll show you how to use the Rating field for WPForms.
Add and Customize the Rating Field
Before we get started, you’ll need to create a new form or edit an existing form.
After opening the form builder, you can look under the Fancy Fields section to find the Rating field. Simply click the field to add it to the form, or drag and drop it into your form’s preview area.
Once the field is added, you can click on it to open its Field Options panel.
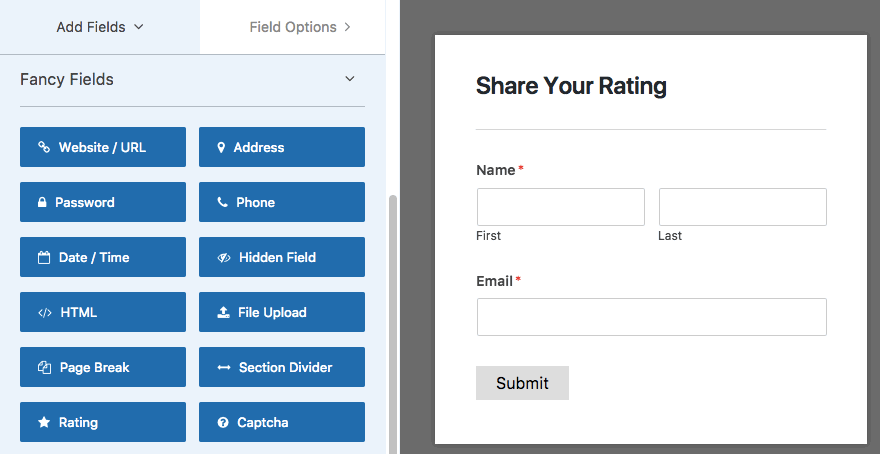
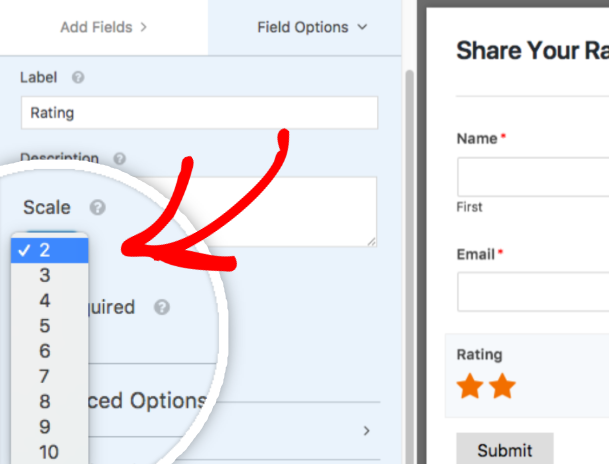
To adjust the scale, or the maximum rating value, click the Scale dropdown. Here, you can choose to display anywhere from 2 to 10 icons within the rating field.
You can also customize the icon’s symbol, size, and color. To adjust any of these, click on the Advanced Options section.
![]()
Icon
By default, the Rating field will display star icons. However, in the Icon dropdown you can choose from any of the options listed below:
- Star:

- Heart:

- Thumb:

- Smiley:

Icon Size
By default, the Icon Size will be set to Medium. If you’d like, you can instead change this to Small or Large.
![]()
Icon Color
By default, the Icon Color will be set to orange. You can easily customize this by clicking the color box and using the color picker tool.
![]()
Data Collection for Ratings
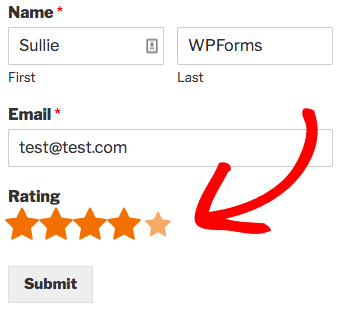
When users fill out this field, the rating they select will be slightly enlarged and darker in color.
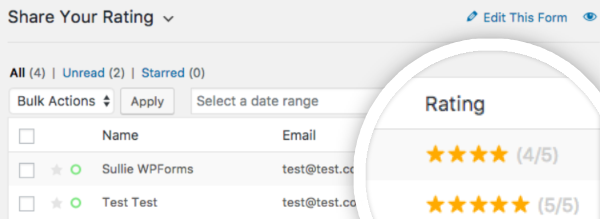
After the form is submitted, you’ll see the rating both as a icons and a numeric value in the entry listing.
Conditional Logic for Ratings
If you’d like, you can also collect more information from users who share a particular rating using conditional logic.
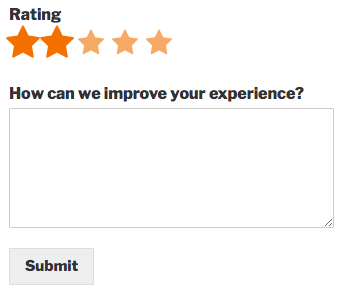
As an example, we’ll ask for additional details from any user who shares a 1 or 2 star rating.
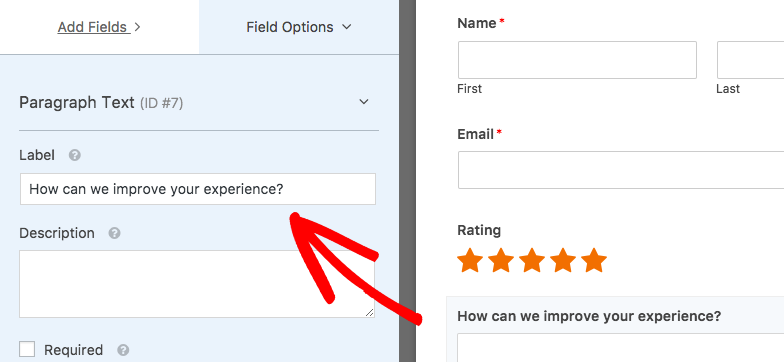
To set this up, we’ll first add a Paragraph Text field. Then, we’ll change the field label to “How can we improve your experience?”.
Next, we need to set up conditional logic so that this field only appears if the user shares a low rating. To do this, click the Conditional Logic section to open it and then check the box for Enable Conditional Logic.
Now you can set rules that determine when the field will appear. For the first rule, we’ll set the logic to read: “Show this field if Rating is 1“.
Then, click the Add new group button to use OR logic.
For the second rule, we’ll add: “Rating is 2“.
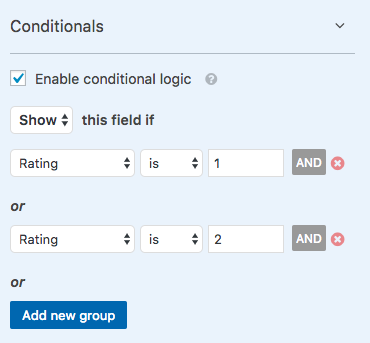
Now this field will remain hidden unless the user selects 1 or 2 stars in the Rating field.
That’s it! You can now add and customize a Rating field for any of your forms.
Next, would you like to find out how to display reviews from your users? Be sure to check out our article on collecting and displaying user testimonials for all the details.