Do you want to add default values for your form fields? Having form fields already filled up or preselected with the relevant input can make it easier for users to complete form. In this tutorial, we’ll show you how to set default values for form fields.
Standard Default Values
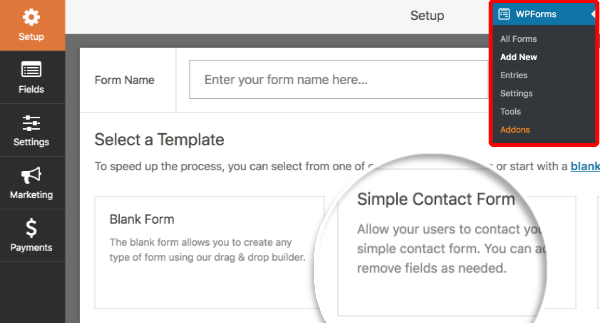
To get started, you’ll need to create a new form or edit an existing form. For this example, we’ll be using the Simple Contact Form template.
You can add default text to the following input fields:
- Single Line Text
- Name
- Numbers
- Website/URL
- Password
- Phone
- Hidden Field
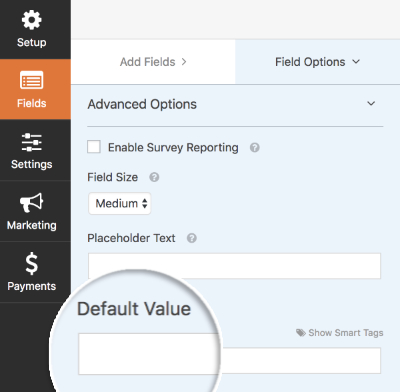
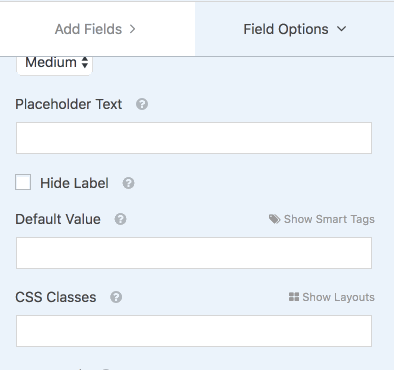
To begin, add any of the above fields to the form. Next, click on the field to open up its Field Options and look under Advanced Options for the Default Valuefield.
In the Default Value field, you can add text or Smart Tags to pre-fill form field. Here we’ll see examples of using each of the different options:
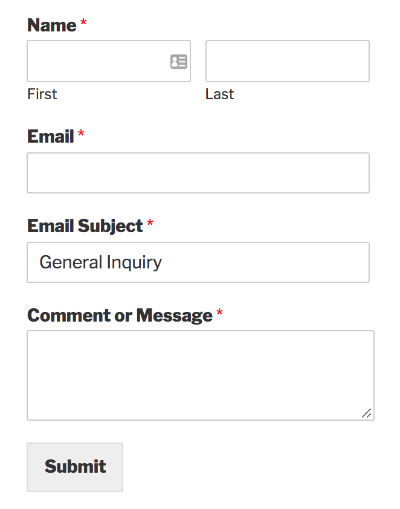
Example: Add Default Value Using Text
A default value can be added by typing directly in the Default Value field. For our example, we’ll add the text General Inquiry into the field.
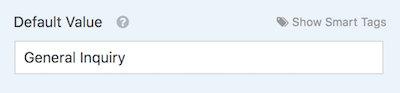
When published to your site, this field would be pre-filled with the text General Inquiry.
Example: Add Default Value Using A Smart Tag
A Smart Tag is a piece of code that can be used to pull specific information into the form, such as page or user information.
In this example, we’ll configure the default value of a Hidden Field using a Smart Tag. A Hidden Field is not visible to users on the frontend, and therefore it’s useful for collecting additional information in the background.
When the Hidden Field has been added to to the form, click the field to open its Field Options and look for the Default Value field. On the top-right corner, click on the Show Smart Tags option to display a list of Smart Tags.
For our example, we want to know the title of the page that the form is embedded on. In order to do this, scroll down the list of Smart Tags to click on Embedded Post/Page Title. The corresponding Smart Tag {page_title} will then be added to the Default Value field.
Once the form has been submitted, we will be able to view the page title in the form entries and notifications.
Add Default Value for Multiple Choice, Checkboxes and Dropdown fields
You can configure choices in the Multiple Choice, Checkboxes or Dropdown field to be pre-selected with specific options when published to your site. The Checkboxes field allows you to set one or more default values, while the Multiple Choice and Dropdown fields allow you to set a single default value.
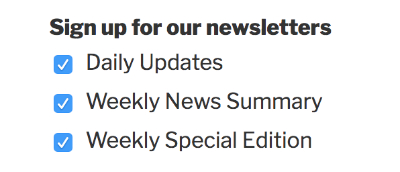
In this example, we’ll add a Checkboxes field into a form to allow users to choose which newsletters they’d like to subscribe to. To open the Field Options, click on the field in the preview area of the form builder.
Next, we can preselect choices in the field by clicking on one or more checkboxes beside each of the choices.

When published on the frontend, these options in the form field will have been already selected.
That’s it! You’ve seen how to set default values for your form fields.
Next, would you like to require a specific input format for a form field? Then be sure to check out our tutorial on how to use custom input mask. This can allow you to set rules for the value a user is allowed to enter into a field.