Would you like to create your own custom form templates? Custom templates allow you to create and use your own unique ‘starter’ forms. If you tend to use many of the same fields and settings in your forms, or if you want to use the same form across multiple sites running WPForms, this can be a huge time saver.
In this tutorial, we’ll show you how to create your own custom form templates from a new or existing form. Here are the steps we’ll cover:
- Create a Form to Use as Template
- Export Form Code to Create a Template
- Use Your New Custom Template
- Delete the Original Form (Optional)
1. Create a Form to Use as Template
To begin, we need a form that will later be copied for our template. You can use an existing form or you can create a new form.
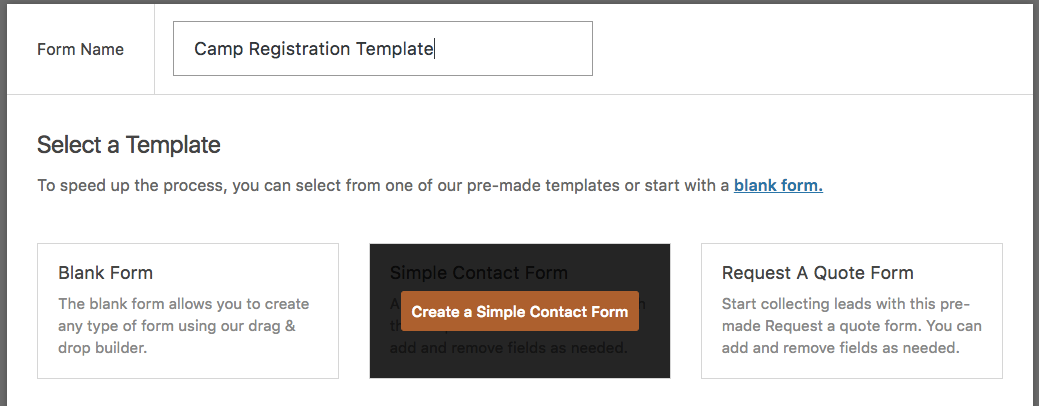
When creating a new form, you can choose to either start with a blank form or an existing template. For this example, we’ll build use the existing template named Simple Contact Form. The template title can be added on this screen in the Form Name field.
Now that you’re in the form builder, we can add a form description under Settings » General.
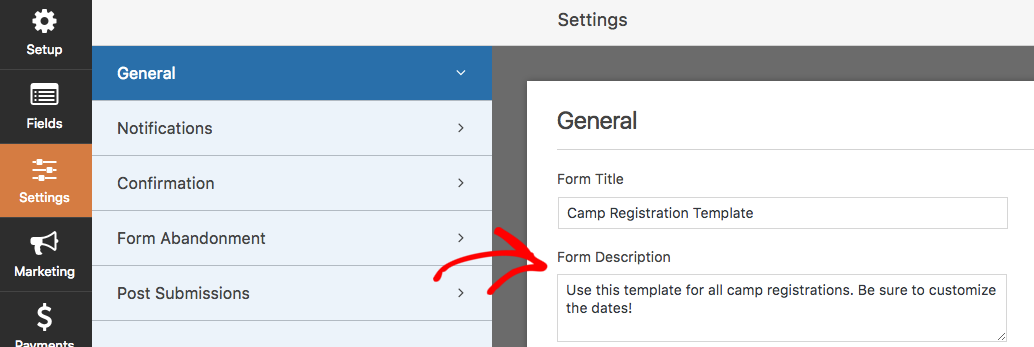
While a regular form’s description would likely include a message for a site visitor, a template’s description should include anything a person using the template would need to know (most importantly, the intended purpose of the template).
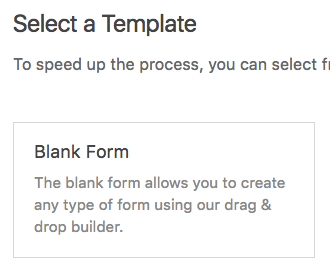
Both the form’s title and description will later appear on the template selection screen, similar to the Blank Form shown here:
After adding the description, you can customize any aspect of this form. This could be simple changes, such as adding fields. You could also make bigger adjustments, such as creating a multi-column layout, adding conditional logic, or customizing notification emails and confirmation messages.
Anything that you add or change in the form builder will be included in the template.
2. Export Form Code to Create a Template
Now that you’ve set up your form, we can create a template from it.
First you’ll need to get your template’s code by going to WPForms » Tools and clicking on the Export tab.
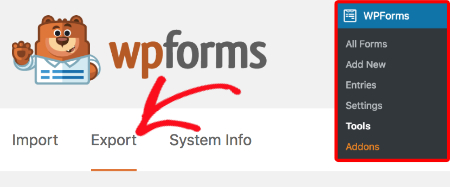
On that page, scroll down to the Form Template Export section, which provides a dropdown list of all of your forms. All you need to do is select the form you just made and click the Export Template button.
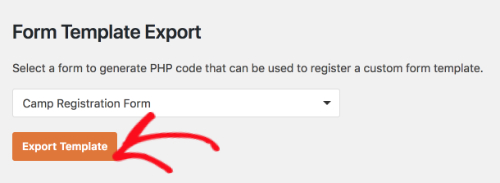
The template code should then be created and displayed on your screen.

Copying and pasting this code to your site files will allow this template to be displayed in the form template list.
Adding this code to your site
We will discuss three options for adding this code to your site. For all of these options, you’ll first need to make sure you have access to your site files.
1) Copy and paste code into functions.php
If you would like the easiest and fastest solution, this is the way to go. You’ll need to open your site’s functions.php file by going to /wp-content/themes/YOUR-THEME/functions.php in your site’s files. Then you can copy and paste the template code into functions.php, save the file, and you’re all set.
2) Paste code into new PHP file, then include it in functions.php
This is very similar to the first option, except that you will put the template code in its own file. This will help to protect it from accidental changes and keep your site code more organized.
If you choose this option, you will first need to open you site’s functions.phpfile. This is located in /wp-content/themes/YOUR-THEME/functions.php. Once you’ve opened the functions file, you can paste in the following code:
// Add Custom Template File
include_once( get_stylesheet_directory() . '/wpforms-custom-templates.php' );
This tells your site to run the code in a file named wpforms-custom-templates.php. Next, we need to make that file. Be sure to create it in /wp-content/themes/YOUR-THEME/ (the same folder as functions.php).
Lastly, you’ll need to paste the template code into the wpforms-custom-templates.php file and save it.
3) Create a custom plugin
This is the best option if you expect to change your WordPress theme in the future or want to use the same template(s) on multiple sites.
Creating a plugin might sound complex, but in this case it actually only requires a few steps:
- Create a new file in your text or code editor and paste in the following:
<?php
/**
 * Plugin Name: WPForms Custom Templates
 * Description: This plugin loads custom form templates.
 * Version:     1.0.0
 */

/**
 * Load the templates.
 */
function wpf_load_custom_templates() {

	// Template code here

}
add_action( 'wpforms_loaded', 'wpf_load_custom_templates' );
- Replace
// Template code herewith the generated code and save the file aswpforms-custom-templates.php. - Open your site files and navigate to /wp-content/plugins/. You can add
wpforms-custom-templates.phpto this folder. - In your WordPress site, open the Plugins page. There should be a plugin named WPForms Custom Templates. Go ahead and activate it.
- Replace

3. Use Your New Custom Template
Now that you’ve completed one of the three options described above, your template should be ready to go!
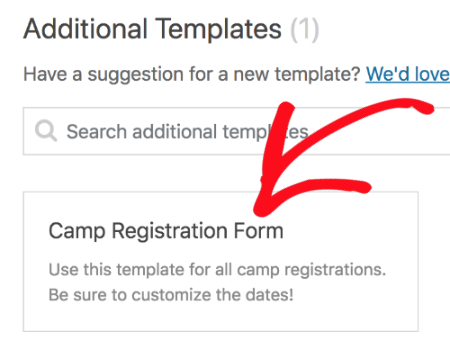
To check that everything is working, let’s try making a new form by going to WPForms » Add New. Under the Additional Templates section, you should see your custom template, including the form title and description you made earlier.
4. Delete the Original Form (Optional)
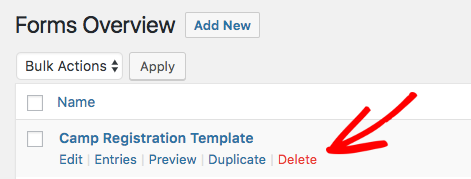
For the last step, you can delete the original form if you like. The template doesn’t rely on the original form in any way, so it’s only necessary to keep if it has associated entries that you need.
To delete the form, you can open WPForms, hover over the form’s row, and click Delete.
That’s it! You can now save time by making your own custom form templates.
Want to customize your forms even more? Check out our guide on how to customize your WPForms validation messages.
