Are you looking to collect more information from new users than just their name and email address? It’s easy when you set up custom user meta fields in WordPress, and create user registration forms with WPForms.
When you create a User Registration form using WPForms, you can add fields to your form to collect your custom user data. But in order to display the data in your user profiles, you’ll need to set up your custom user meta fields on your WordPress site first. In this guide, we’ll show you how to set up custom user meta fields in WordPress, and then collect that data with WPForms.
- What are Custom User Meta Fields?
- Install Advanced Custom Fields
- Add New Custom Fields
- Create a User Registration Form
- Publish Your Form
Before we get started, be sure to install the WPForms plugin on your WordPress site. Also, you’ll need to have the User Registration addon installed and activated on your site. Then, we’ll need to set up custom user meta fields on your WordPress site.
1. What are Custom User Meta Fields?
Custom user meta fields are additional information you collect from your users during the registration process that WordPress doesn’t support on the user profile page natively.
For example, here are a few custom fields you can add to the user registration form on your site:
- Address
- Phone number
- Birthday
- Gender
WPForms allows you to completely customize your user registration forms. Aside from text fields, you can add fields like dropdown menus, radio buttons, etc in your registration form.
But in order to see that data on your user profiles, you’ll need to set up those custom fields on your WordPress site too so it can process and display it.
Let’s take a look at how to set up custom meta fields, so they can be seen in the user profiles.
2. Install Advanced Custom Fields
The Advanced Custom Fields plugin helps you to handle the user meta fields in your registration form and display them in your users’ profiles. You can learn how to install a plugin if you’re not sure how to do it.
3. Add New Custom Fields
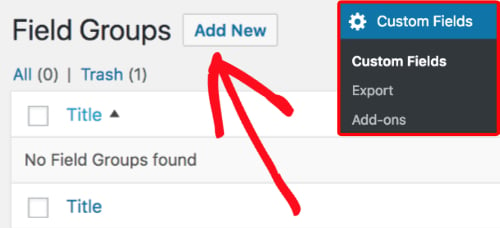
To add custom fields in the newly installed plugin, go to Custom Fields » Add New.
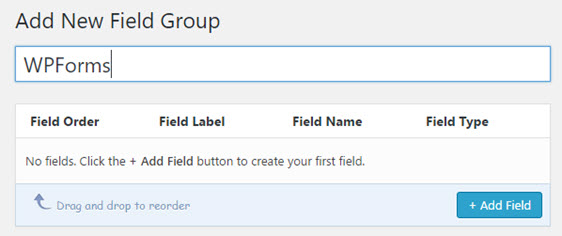
You may add a title for your new field group. For our example, we’ll name it WPForms. Then, you’ll need to add a new field by clicking Add Field.
In this example, we’ll add custom user meta fields for the user’s address, phone number, and gender.
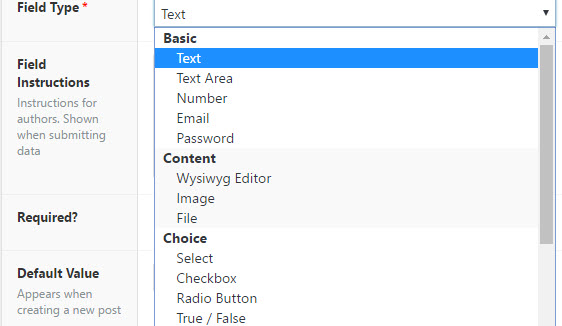
For each custom field, you’ll be asked to specify a Field Label, Field Name and Field Type along with other optional fields.
- Field Label: This is the name of the field appears on the profile page of your users.
- Field Name: This field contains the meta key to be used later in our user registration form. This field value will be created automatically once you’ve specified Field Label.
- Field Type: You can select an appropriate field type for each field, like text, number, password, etc. For details on available field types, please see the Advanced Custom Fields overview.
Below are a few recommendations for choosing the right field type in Advanced Custom Fields.
- Address: Choose Text Area as the field type which is big enough to display the entire details at a glance in the user profile page.
- Phone Number: Choose Text as the field type because phone numbers includes special characters like brackets, which can’t be stored in the Number field type.
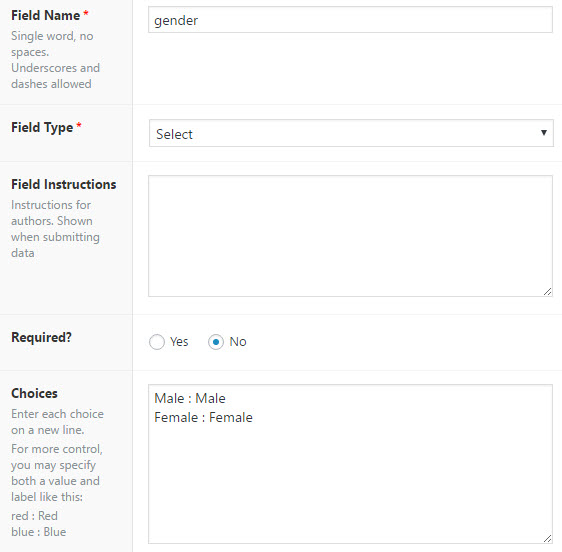
- Gender: If you’re using a Dropdown field in WPForms, choose Select or if you’re using a Multiple Choice field, choose Radio Button. Additionally, you’ll need to specify the choices in the Choices field.
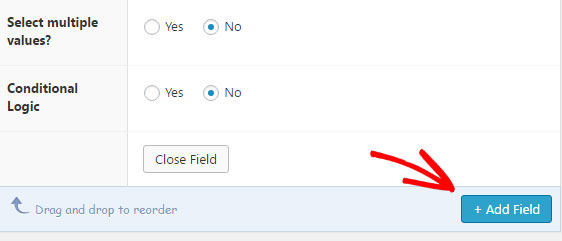
Next, scroll down and click on Add Field to configure the next custom field.
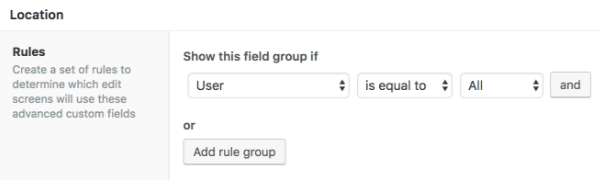
To display these fields in the WordPress user page, scroll down to the Locationsection to configure the condition for showing the fields. When you’re done, the complete statement would read Show this field group if User is equal to All.
When you’re ready, click on Publish to save the fields. If you’d like to see the custom fields you’ve just added, you can navigate to your own profile page by clicking on User » Your Profile and scroll to the bottom of the page.

4. Create a User Registration Form
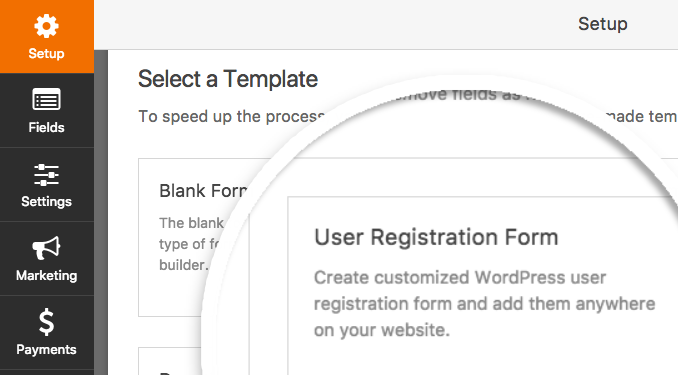
Now that your custom fields are set up, you can create a user registration form if you don’t already have one. To do this, navigate to WPForms » Add New. Then, select User Registration Form.
You can add new fields from the left panel and customize the order of fields using our drag and drop feature.
In this example, we’ll add the fields we created above: Address, Phone number and Gender (this could be a Dropdown or Multiple Choice field depending on what you decided earlier).
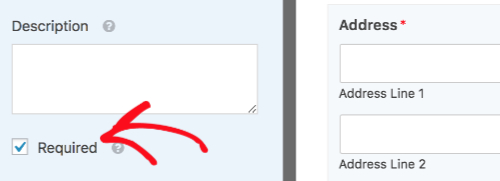
If you need these fields to be filled by the user, you can set the fields as Requiredin the form builder. With this setting enabled, users will have to add an input or make a selection in the field in order to submit the form.
When you’ve added the fields to the form, you’ll need to configure the user registration settings by going to Settings » User Registration.
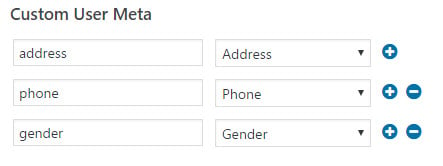
To match the form fields with your new custom user meta added in Step #2, scroll down the page until you find the Custom User Meta section.
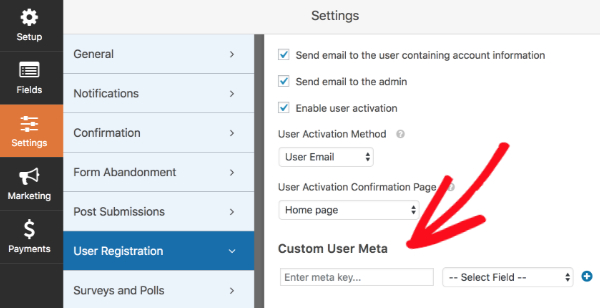
In the meta key field, you can copy the Field Name from Advanced Custom Field panel. After adding each field, click the plus (+) button to create a new field.
For the Select Field dropdown, choose the fields that are to be mapped to the custom fields. In our example, we named our fields Address, Phone Number and Gender.
Once you’re done setting up the form, be sure to click Save.
5. Publish Your Form
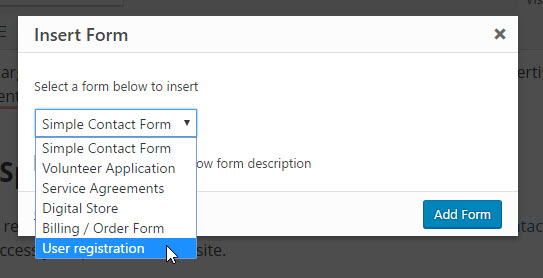
To publish the form you just created, you can either create a new page or edit an existing page.
In the page editor, click the Add Form button just above the text editor. Now you’ll be asked to select a form. Select the form you just created and click the Add Form button.
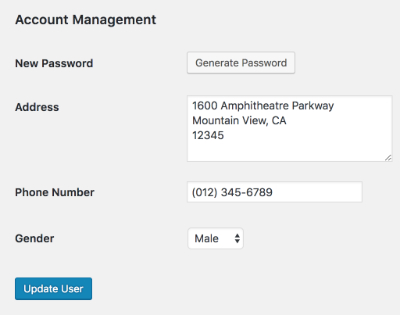
When the page is published, users will be able to register using your new form. To access their submitted data, first go to Users » All Users. Then, select a user and click Edit.
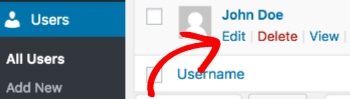
Finally, scroll down the page and look for the new fields.
That’s it! We hope this guide helped you to set up custom user meta fields.
Next, would you like your site visitors to contribute content to your site without registering? Then, be sure to check out our guide on how to install and use the Post Submissions addon.