Would you like change how your form behaves based on what the user selects or enters into a field? Conditional logic allows you to change what the user sees in your forms, what notification email gets sent out, and more. In this tutorial, we’ll introduce you to conditional logic in WPForms.
If this is your first time creating a form with WPForms, then be sure to first take a look at this article on creating your first form with WPForms.
Basic Conditional Logic
The most common use of conditional logic is to show or hide fields depending on a user’s selection. For this example, we’ll make a single field appear when the user selects a specific option from a Dropdown field.
Let’s get started by opening the form builder. From there, click on the form field that you want to show or hide. This will open its Field Options panel.
If you scroll down on the Field Options panel, you’ll see a Conditionals section. Go ahead and click this to open it, then check the box labeled Enable Conditional Logic.
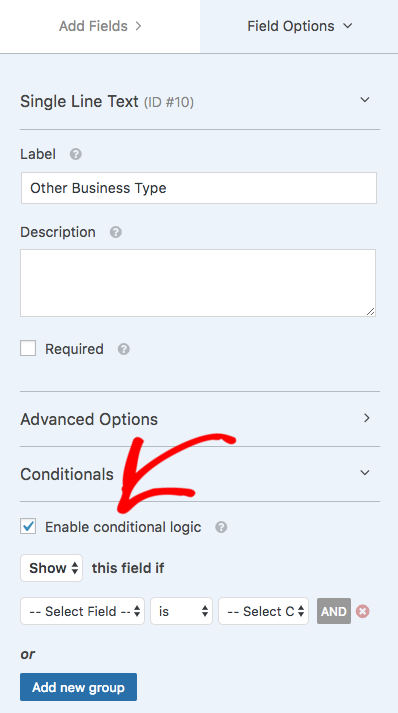
Now that conditional logic has been enabled, you should see a few dropdowns to set your condition rule. Here are the questions you’ll need to consider when filling in these dropdowns:
- Show/Hide: Would you like this logic to cause the field to be shown or hidden when conditions are met?
- Select Field: Which field would you like this logic to depend on?
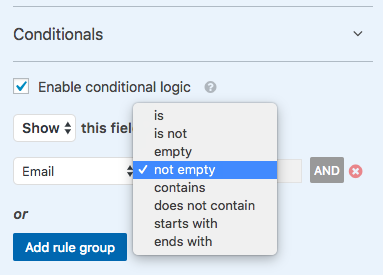
- Comparison: What comparison would you like to use on this field? Options include: is, is not, empty, not empty, contains, does not contain, starts with, ends with, greater than, and less than.
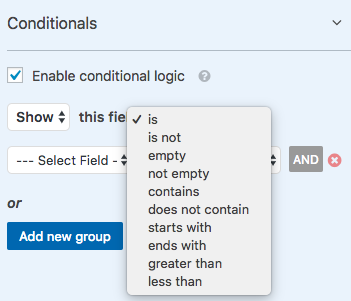
- Select Choice: What value would you like the field to contain in order for this condition to apply? This field will deactivate if you select empty or not emptyfrom the comparison dropdown.
Go ahead and fill out each of these dropdowns. For our example, we’ll apply conditional logic to our Other Business Type field. We’ll set the logic to say: Showthis field if the Business Type dropdown is set to Other.
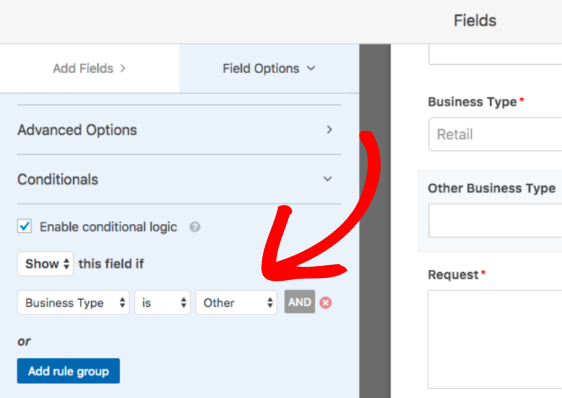
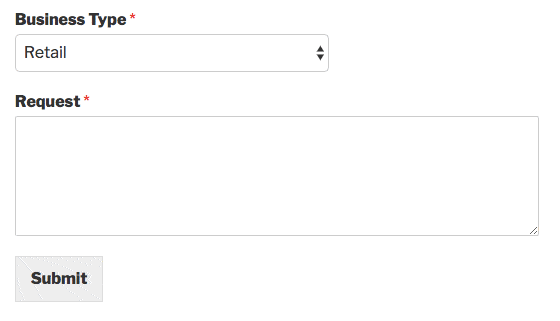
Now when a user selects the Other option in this field, the Other Business Type field will display. Otherwise, the extra field will remain hidden.
Complex Conditional Logic
You may find that a single conditional logic rule isn’t complex enough for some situations. However, it’s possible to add as many conditions as you’d like.
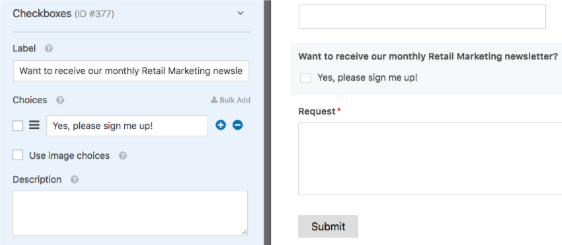
As an example, we’ll ask users if they’d like to subscribe to our Retail Marketing newsletter. However, we only want to display this option if they’ve shared an email address and chosen Retail as their Business Type.
To set this up, we’ll first add a Checkboxes field to our form. Then, we’ll customize the field label and options to fit our needs.
Next, we’ll repeat the process from the section above to enable conditional logic and add our first rule. This rule will state: Show this field if Email is not empty.
Now that we have the first condition set, we need to decide whether to use AND or OR conditional logic for the second condition.
For our example, we want the checkbox to display if the user enters an email and also chooses Retail, so we’ll click the AND button to add AND logic.
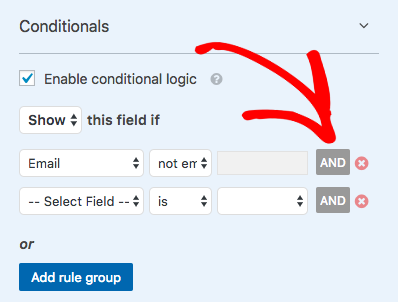
Now we just need to set up our second rule and save the form. With these our AND logic in place, our checkbox field will only display if both of these conditions are met.
More Examples
There are so many ways to use conditional logic in your forms that it would be hard to cover them all in a single tutorial. Instead, we’ve shared detailed examples in many other docs and blog posts.
Below is a list linking to some of our most popular tutorials showing examples of how to use conditional logic in WPForms:
- General Instructions/Inspiration
- Examples for Specific Goals
- Examples for Email Marketing Integrations
That’s it! We hope this article helped you learn how to use conditional logic with WPForms.
Next, would you like to collect feedback from your users? Be sure to check out our Surveys and Polls addon tutorial for details on gathering and sharing user-provided data.