The block editor consists of blocks. But what are blocks? Well, a block can be pretty much anything. For example, you can have blocks for:
- Regular text
- Images
- Video embeds
- Buttons
Before you start adding some blocks, let’s go over a quick run-down of the elements of the main block editor interface: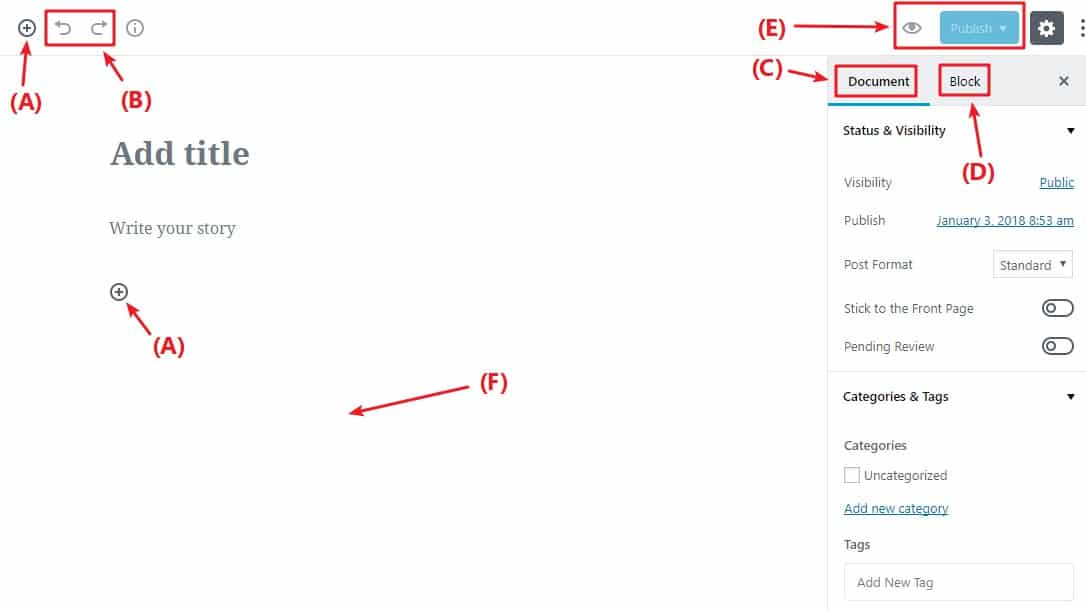
- (A) – lets you add new blocks.
- (B) – undo/redo buttons
- (C) – gives you access to document settings, covering things like categories & tags, featured images, etc. This is similar to the current sidebar in the WordPress editor
- (D) – when you have an individual block selected, this gives you access to settings that are specific to that block
- (E) – lets you access a live preview of your post or publish/update your post
- (F) – once you add some blocks, this is where you’ll actually work with your post’s content
Adding new blocks
As discussed in the intro, you’ll use separate “blocks” to build your layouts with the new editor.
To add a new block, all you need to do is click the +Plus icon and select the type of content you want to add:
In the example above, we showed you how to add a basic paragraph block. But the block editor actually includes a ton of different blocks, divided into different sections:
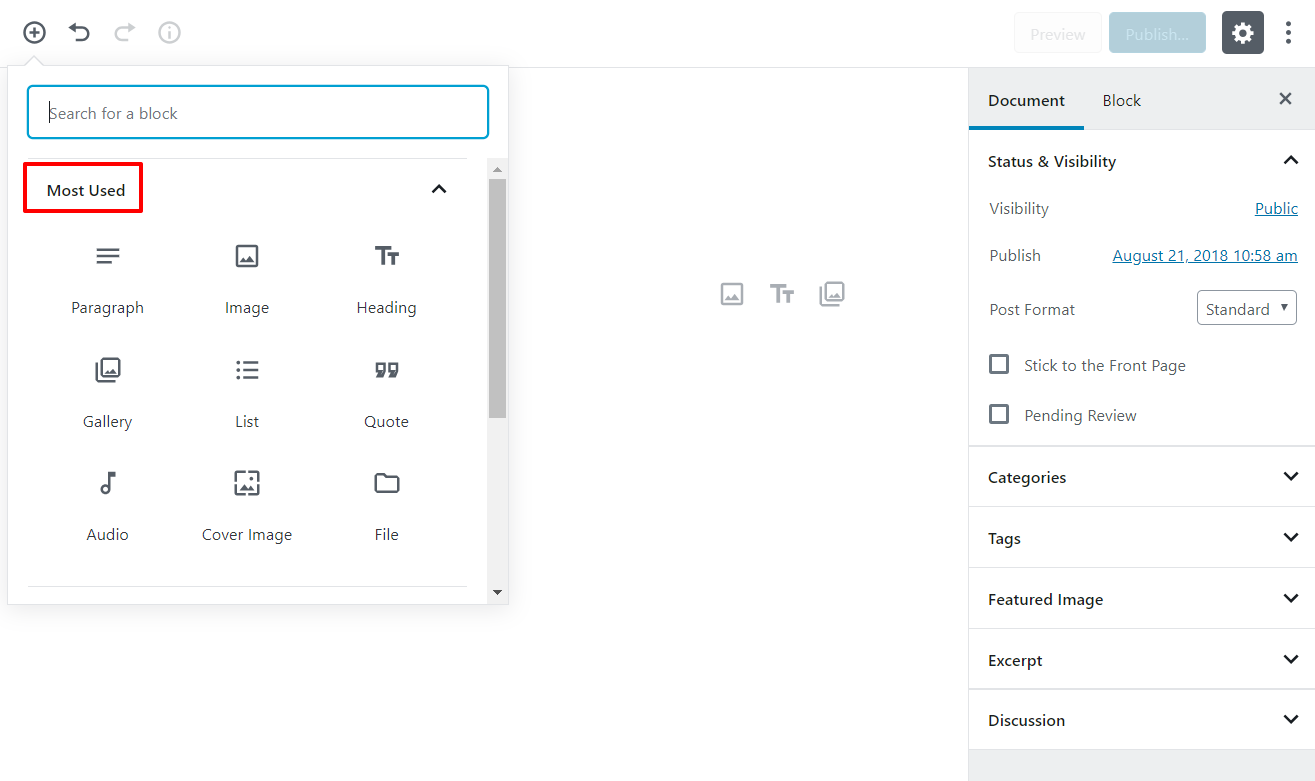
At the top, you see a list of your Most Used blocks. But if you scroll down, you’ll also see sections for Common Blocks, Formatting, Layout Elements, Widgets, and Embeds:
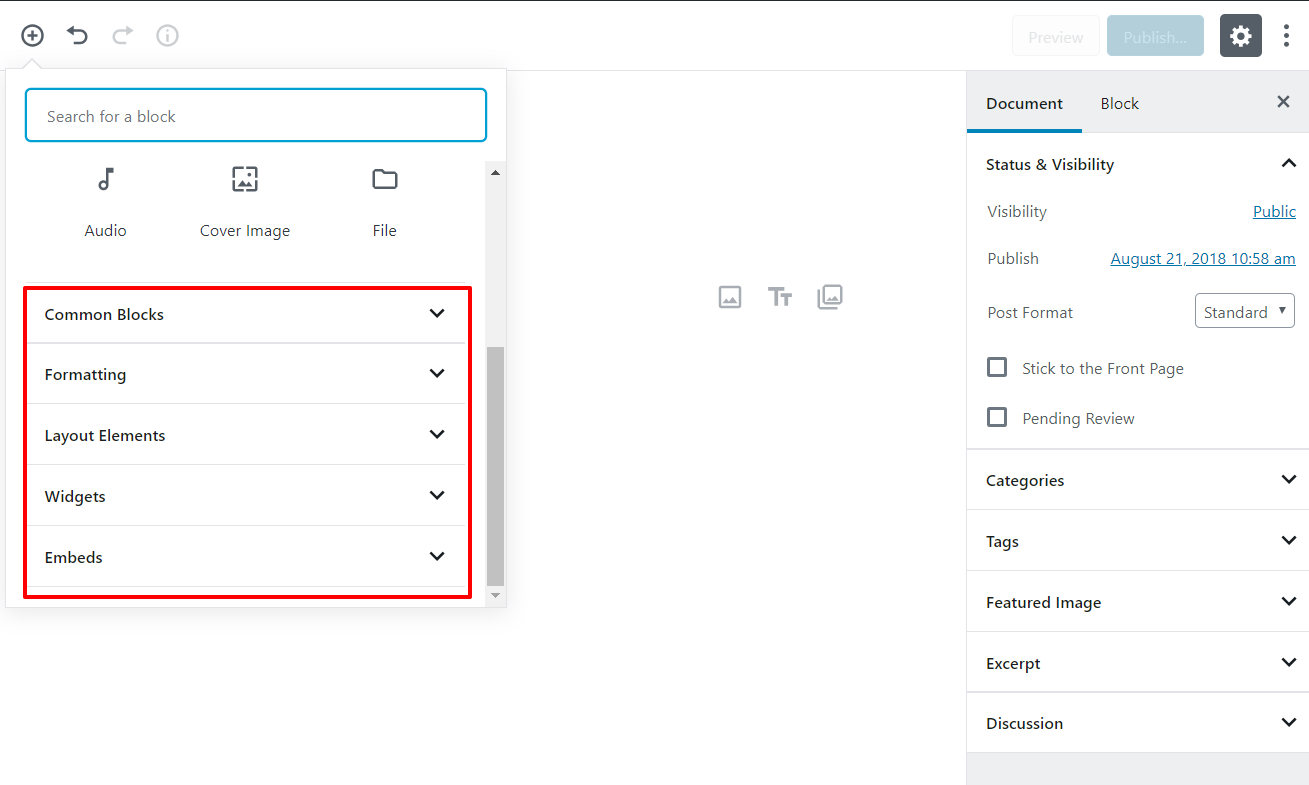
- Inline Elements – only contains one block for an inline image.
- Common Blocks – contains basic building blocks like images, paragraphs (regular text), headings, quotes, etc.
- Formatting – let you add more formatted content like pull quotes, tables, or the classic WordPress text editor
- Layout Elements– let you split text into two columns, include buttons, separators, or the “More” tag
- Widgets – let you add shortcodes, latest posts, or categories. It’s even possible to display sidebar widgets right in Gutenberg.
- Embeds – help you embed content from external sources like Twitter, YouTube, Facebook, Instagram, and more.
Building a basic post layout
Let’s start off simple. Say you just want to build a basic blog post layout that includes:
- Regular text
- An image
- A quote
- An embedded YouTube video
Here’s how you’d do it:
First, you’d write your entire post in the editor.
Adding the non-text blocks
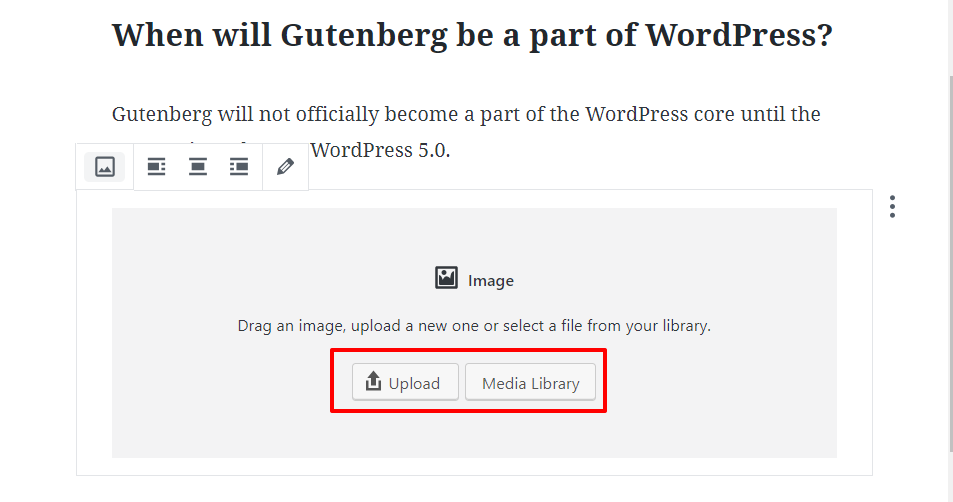
Now that your content is split into blocks, you can hover over the spot where you want to insert your first image and click the plus icon. That will create a break. Then, click the plus icon again to insert the image block:
Optional – creating different columns
Want to get even more creative? Gutenberg now includes an experimental columns feature that lets you quickly create multiple columns. All you need to do is add the Columns (Beta) block from the Layout Elements section. Then, you can insert other blocks inside it:
Once you’re finished, all you need to do is click the Publish button:
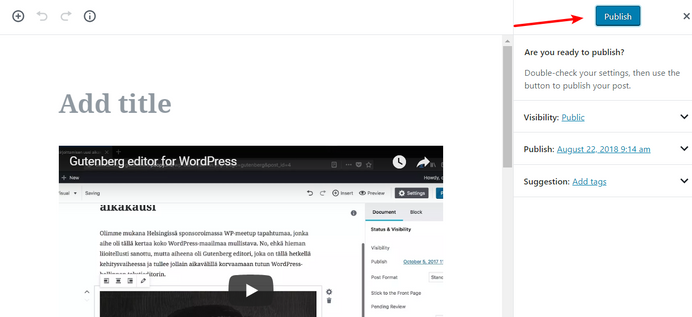
And you’ll have your formatted blog post on the front-end.
How to customize individual blocks
Because the block editor includes a ton of different blocks, we can’t show you how to use each individual block.
But we can give you a basic framework that applies to all blocks.
Basically, you control the content in the actual body of the editor:
For basic text styling and alignment, you can use the menu bar that appears when you hover over a block:
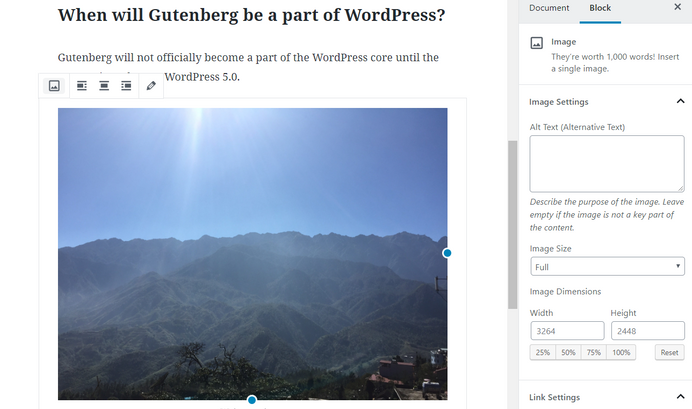
And for more advanced styling, you’ll usually style the block in the Blocksettings tab.To access that tab, select the block you want to edit and browse to the Block tab:

How to rearrange individual blocks
To rearrange blocks, you have two options. You can use the Up or Downarrow when hovering over a block to move the block in that respective direction:
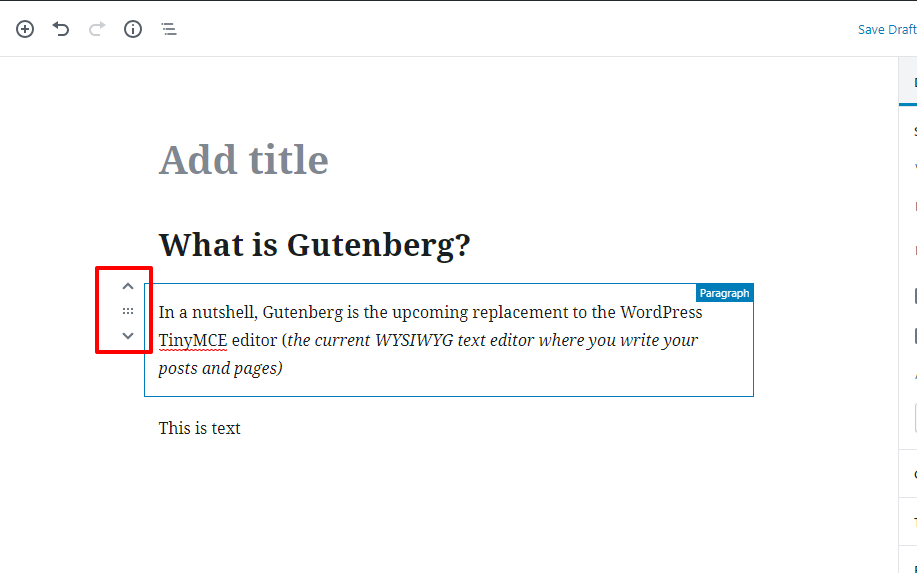
Or, you can drag and drop blocks. To activate the drag and drop functionality, you’ll need to hover your mouse over the six dots between the up and down arrows

Putting it all together
Once you pick up the flow of how things work with the new block editor, it’s fairly painless and intuitive.
What happens to my old content built with the old editor (TinyMCE) when the move is made from the TinyMCE to the Block Editor? Read about it here.