Orders are created when a customer completes the checkout process, and they are visible by Admin and Shop Manager users only. Each order is given a unique Order ID.
An order also has a Status. Order statuses let you know how far along the order is, starting with Pending and ending with Completed. The following order statuses are used:
- Pending payment – Order received, no payment initiated. Awaiting payment (unpaid).
- Failed – Payment failed or was declined (unpaid). Note that this status may not show immediately and instead show as Pending until verified (e.g., PayPal).
- Processing – Payment received (paid) and stock has been reduced; order is awaiting fulfillment. All product orders require processing, except those that only contain products which are both Virtual and Downloadable.
- Completed – Order fulfilled and complete – requires no further action.
- On-Hold – Awaiting payment – stock is reduced, but you need to confirm payment.
- Cancelled – Cancelled by an admin or the customer – stock is increased, no further action required.
- Refunded – Refunded by an admin – no further action required.
Diagram of order statuses
This visual representation follows an order from Pending to Completed, Canceled or Refunded.

Viewing orders
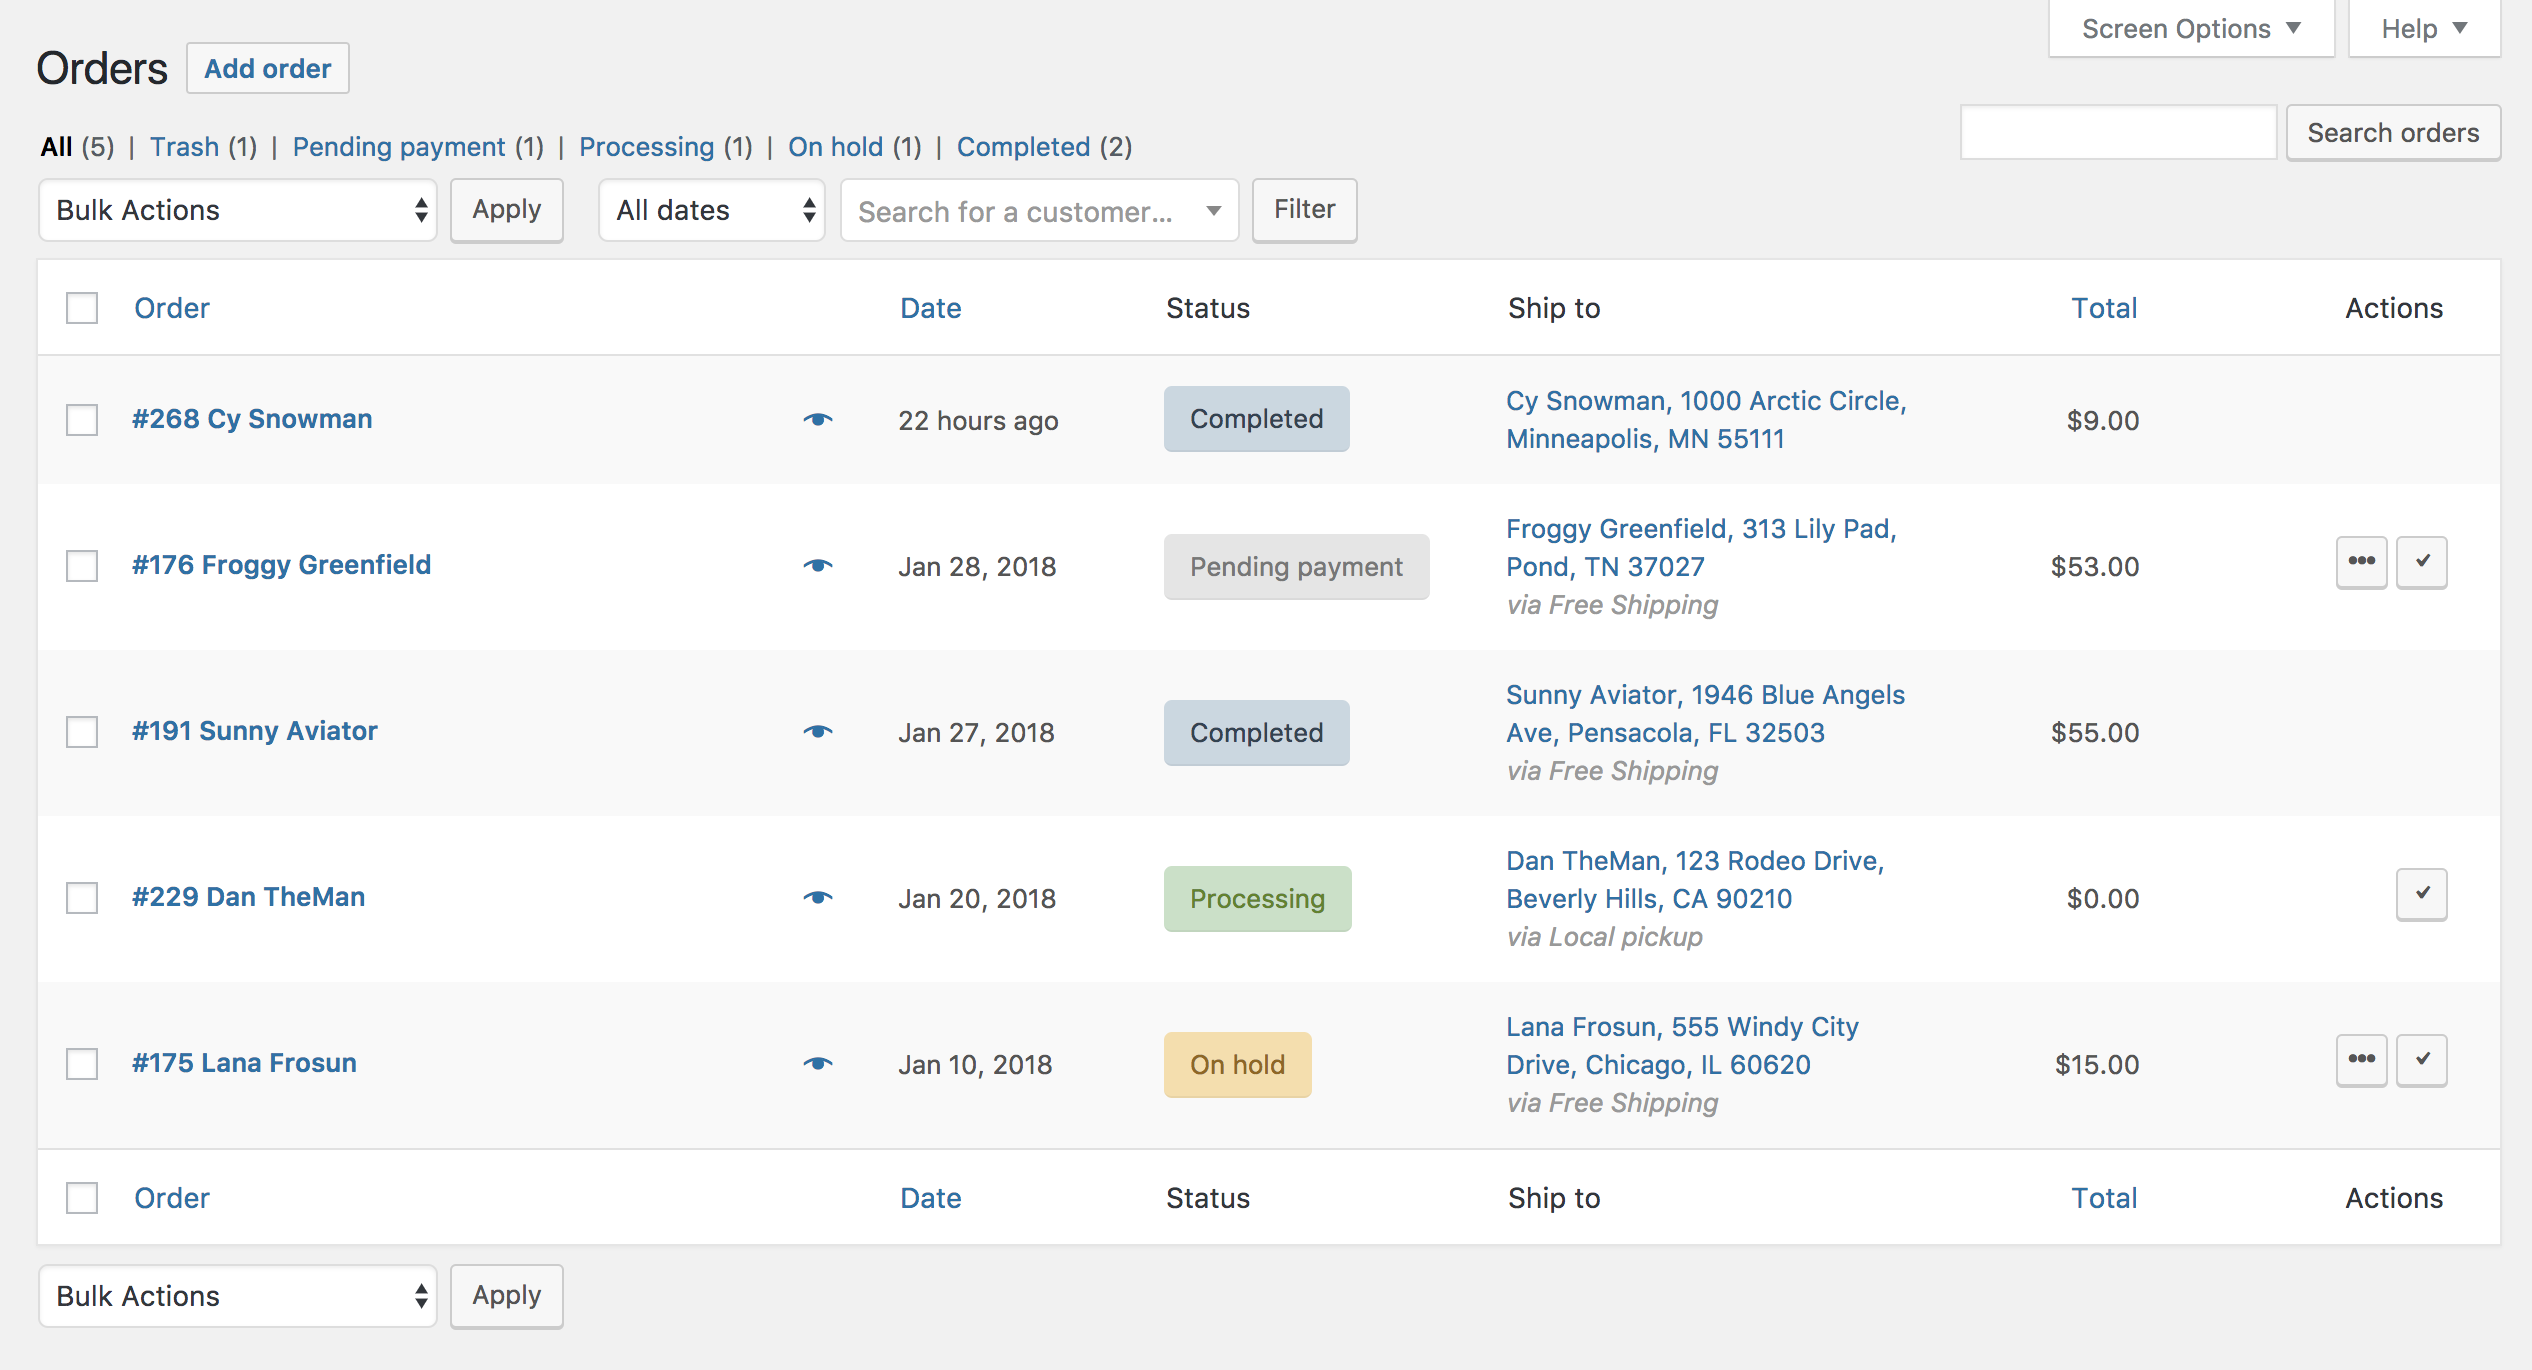
When you start taking orders, the Orders management page begins to fill up. View these at: WooCommerce > Orders.
Each row displays useful details, such as order number and customer name, date of purchase, order status, shipping address, and purchase total.
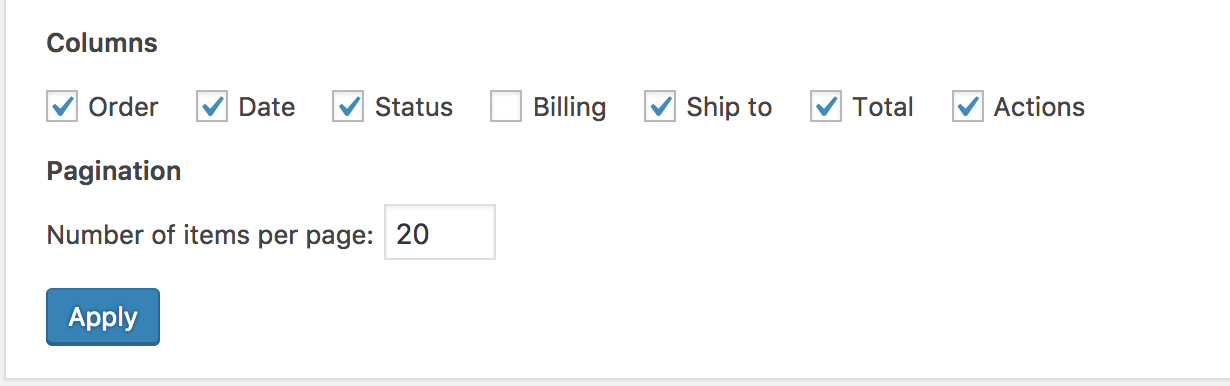
Should you need more or less information on the Orders page, you can open Screen Optionsat the top right corner. A panel opens.
Select which Columns and how many Items you want displayed on each page, then Apply.
Filter orders by Date (month/year) or Search for a (registered) Customer.

Arrange orders in ascending or descending order by Order number, Date or Total by clicking the heading.

Click the order number and customer name to see the Single Order page, where you can also Edit order details, Update Status, and Add Notes.
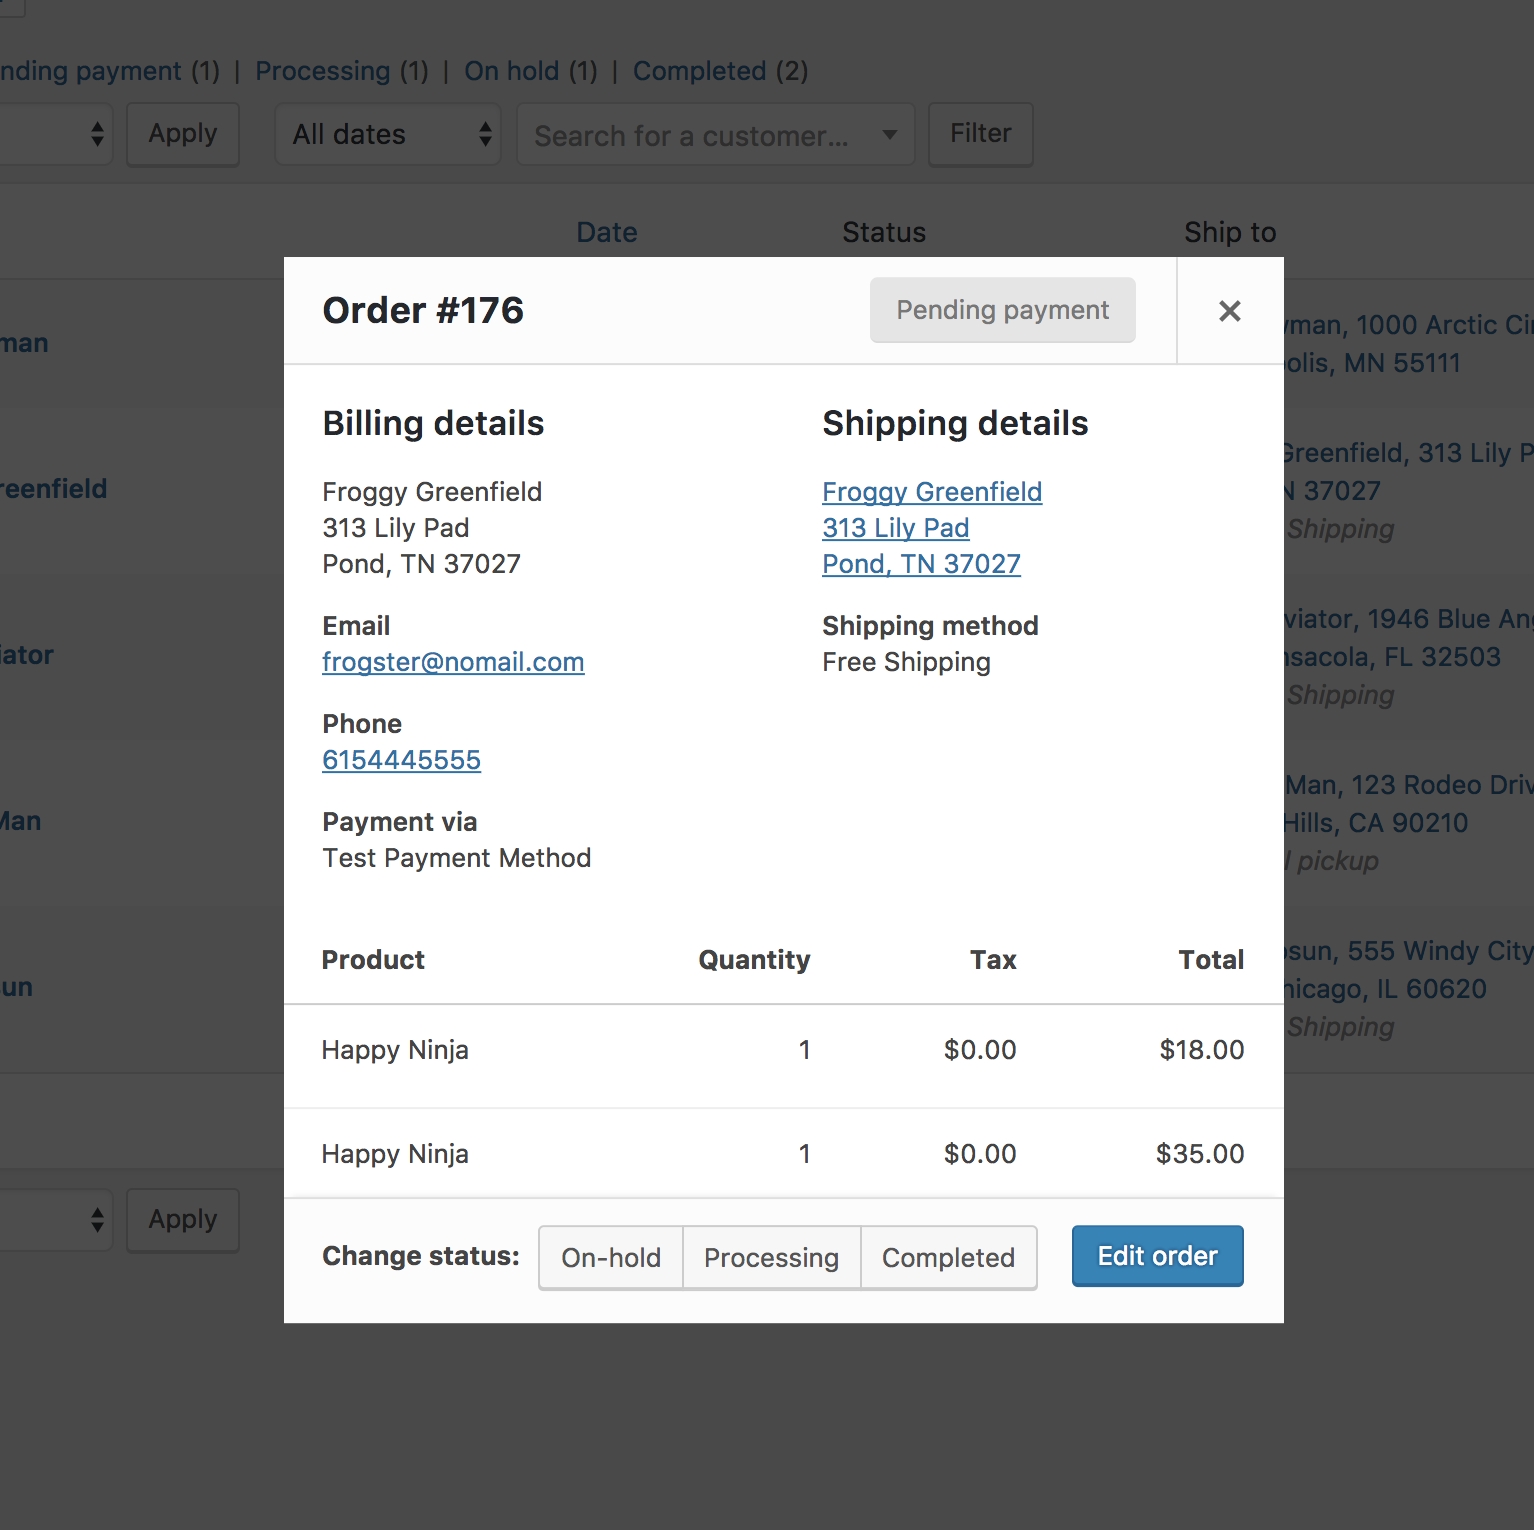
Order rows have a Preview ‘eye’.

Clicking Preview opens a Modal, containing order number, order status, billing/shipping details, items ordered, payment method, and the option to change/edit order status.
Order Statuses are color-coded and descriptive.
- Canceled – Grey
- Completed – Blue
- Failed – Red
- On Hold – Orange
- Pending Payment – Grey
- Processing – Green
- Refunded – Grey
Hovering over an order Status displays Notes made on the order.

At the end of a row are shortcut buttons to quickly mark orders as Processing or Complete.

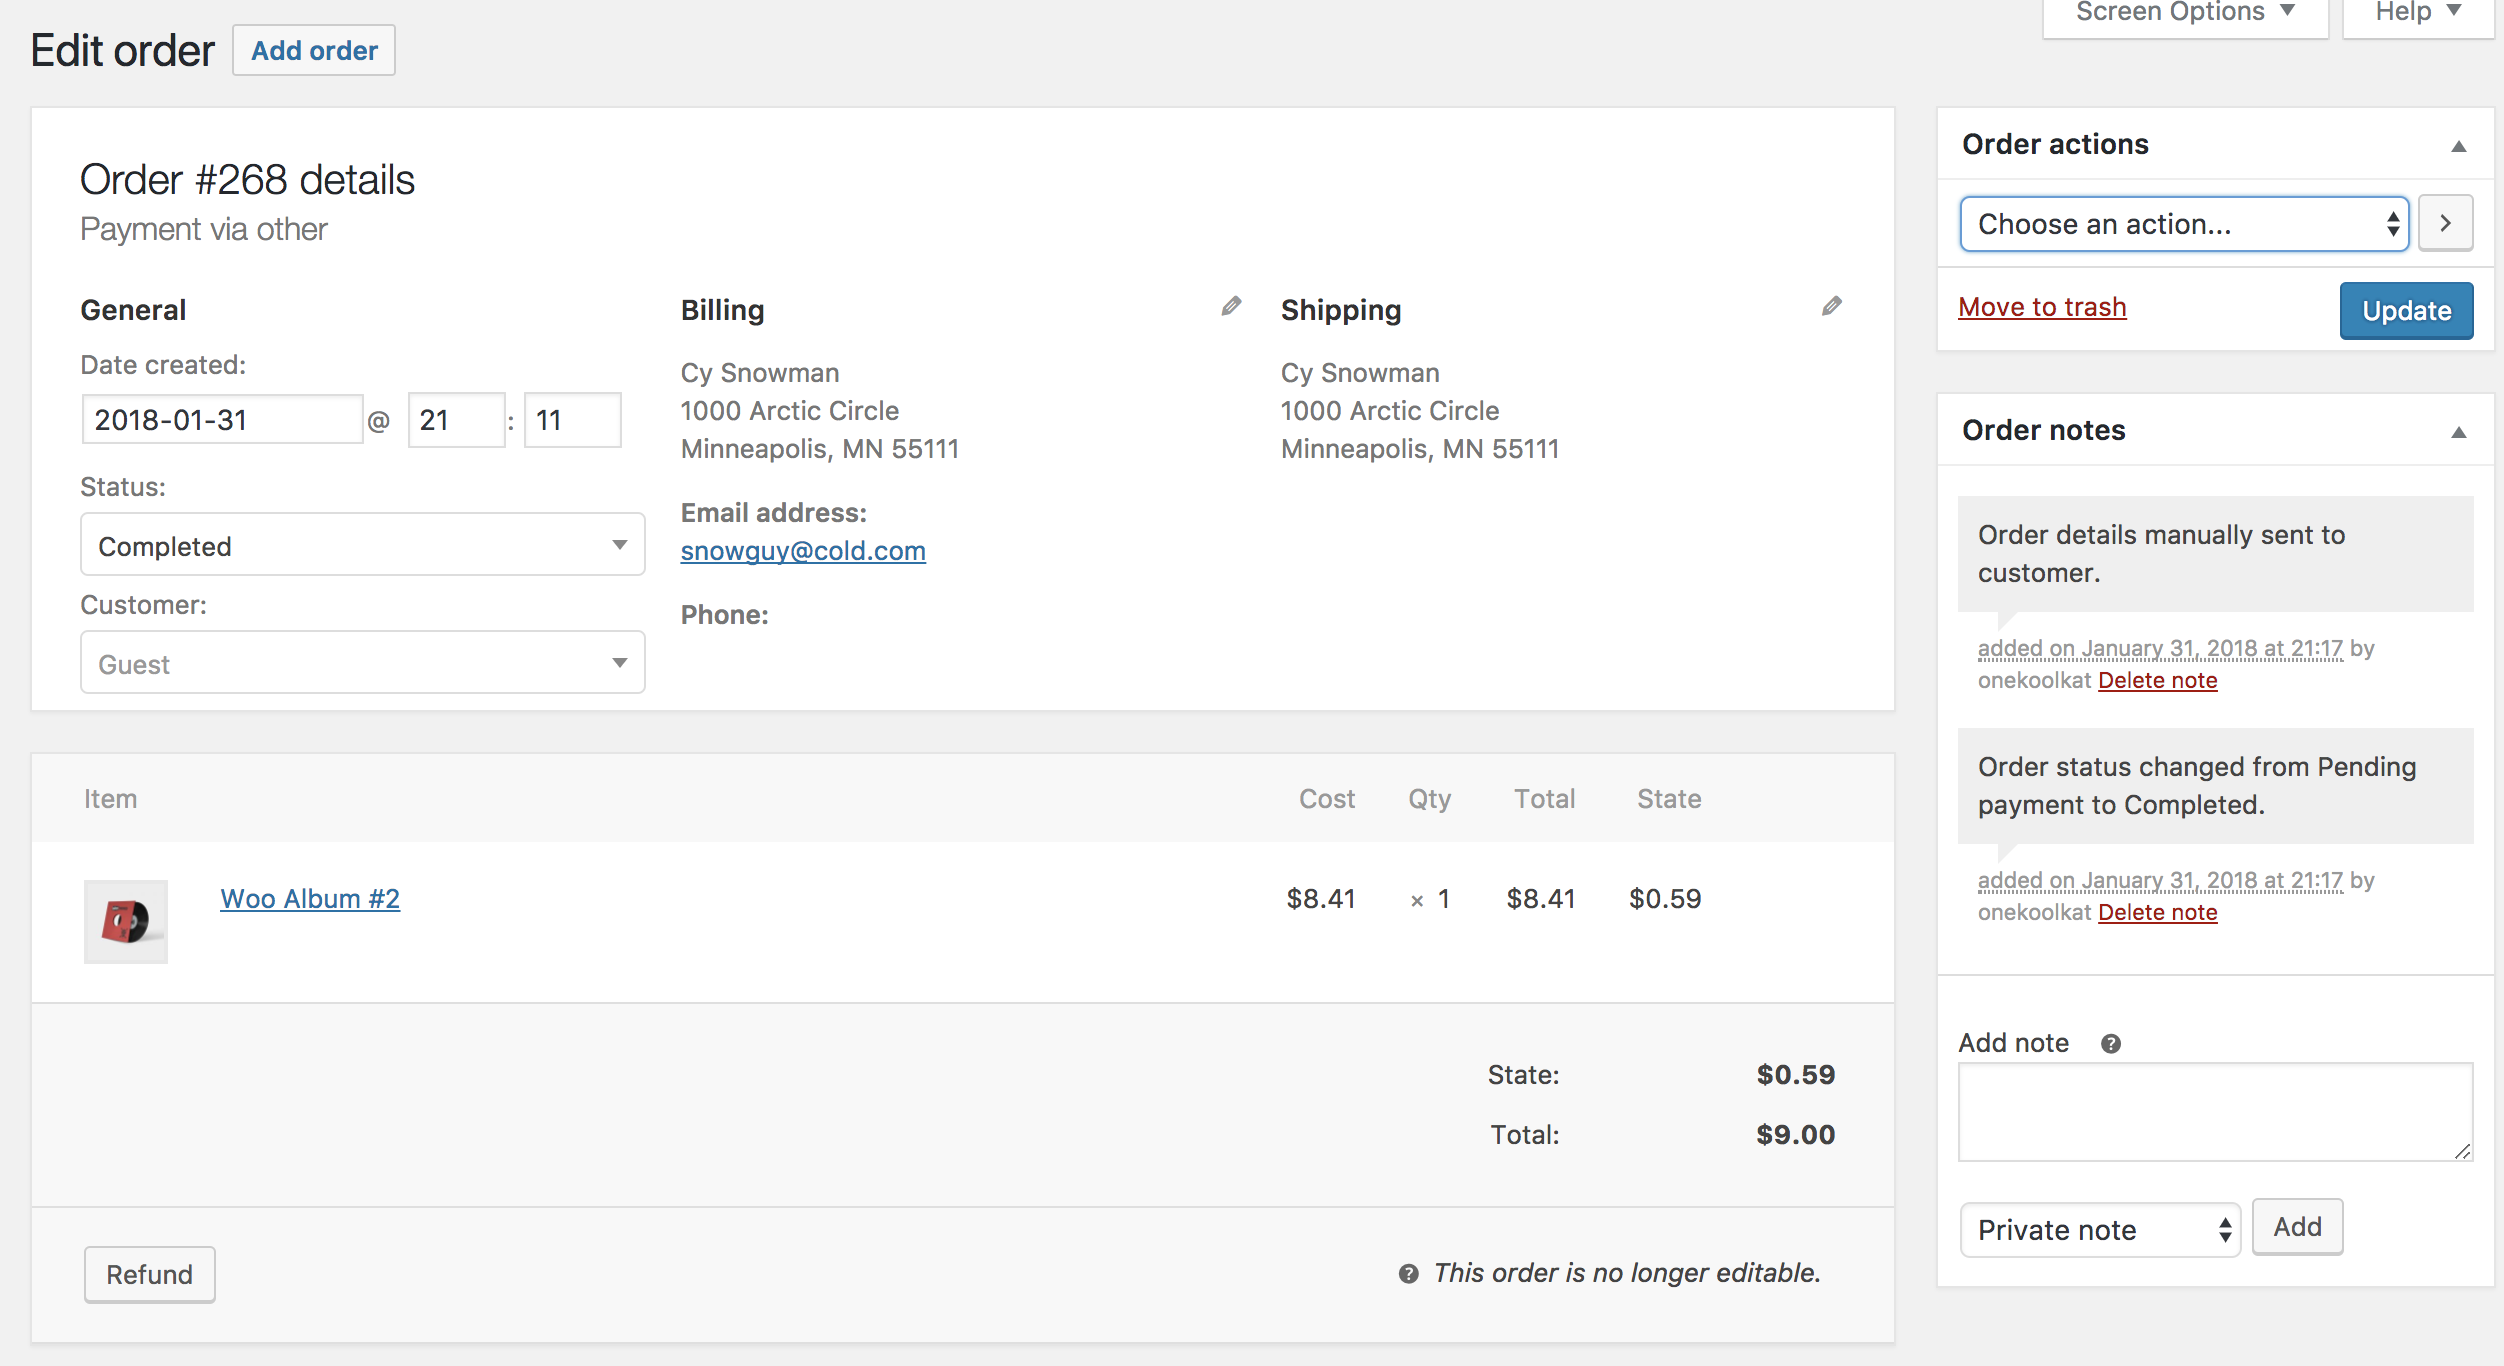
Editing/viewing single orders
From the Single Order page not only can you view all order data, but also edit and update.
- Change the order status
- Edit order items – modify the product, prices, and taxes
- Stock – Reduce and restore stock for an order
- Order Actions – Email order details to customer (handy if manually creating an order for your customers) or Regenerate download permissions
- Modify product Meta to edit product variations by removing and adding meta
- Apply coupons. You will need to know the coupon code to apply to the order. Coupon usage counts are tracked, and coupons can also be removed from orders. Note: the order must be unpaid for coupons to have an affect
- Add fee. You can enter an amount or percentage to add a fee to an order. Negative fees will apportion taxes between all other items, and will not make the cart total go below zero
Order Data
The Order Data panel lets you modify the order status, view (or change) the customer’s order note, and change which user the order is assigned to.
You can also find customer billing and shipping addresses, along with a link to view other purchases the customer may have had in the past. To edit addresses, click Edit and a form appears. Once saved, the new address is displayed in a localized format.
Order Items
The next panel on the order page is the Order Items panel. It lists items in the order, quantities, and prices.

The editable parts of line items include:
- Tax Class – Tax class for the line. This may be adjusted if, for example, the customer is tax exempt.
- Quantity – Number of items the user is purchasing
- Line Subtotal – Line price and line tax before pre-tax discounts
- Line Total – Line price and line tax after pre-tax discounts
- Add Meta – Add and remove meta to change product variable options.
- Sorting – Sort by Item, Cost, Quantity, and Total by clicking on the respective listed items.
It’s also possible to add additional fees for items. Select Add Fee and enter fee name, tax status and amount:

To add custom meta fields, use the Custom Fields metabox:

Order Totals
Order Totals stores totals and tax for the order. Enter these values yourself or have them partially calculated for you using the ‘calc totals‘ button. Totals comprise:
- Cart Discount – pre-tax discounts. Can be auto-calculated.
- Order Discount – post-tax discounts. Need to be input manually.
- Shipping cost – cost excluding tax
- Shipping method – name of the method
- Cart tax
- Shipping tax
- Order total
- Payment method – name of the payment method used
There are two buttons available on this panel – calc taxes and calc totals. Calculating taxes will use your prices, and calculate tax based on the customer’s shipping address. If the customer’s address has not been input, it defaults to the store’s base location.
There is also a section called tax rows, which is where to define and name multiple tax rows. This is useful if, for example, you charge multiple taxes or use compound taxes. Values are displayed on the customer invoice.
Order/Customer Notes
The Order Notes panel displays notes attached to the order and can be used for storing event details, such as payment results or reducing stock levels, or adding notes to the order for customers to view. Some payment gateways also add notes for debugging.
Notes can be a powerful tool for communicating with customers. Need to add a tracking number for shipping? Is stock delayed? Add a customer note, and they are automatically notified.

To send a note to a customer on an order, enter the note, then select: Note to Customer > Add.

The following note types are possible:
- Purple: System status notices, such as payment gateway details.
- Grey: General status updates, such as status changes or private notes. Customers do not see these notes, but may receive notification of them, e.g., When status changes from processing to completed, an email may be sent (depending on your settings).
- Blue: Notes to the customer. Customers receive notes via email, but can view them by viewing an order, or using the WooCommerce order tracking page.
Adding an Order Manually
To add an order:
- Go to: WooCommerce > Orders.
- Use Add New at the top of the page. The Single Order page appears.
- Input customer details, add line items, apply coupons, apply fees and calculate totals.
- Set a status for the new order, e.g., If it needs to be paid, use ‘Pending’.
- Save.
Use the Order Actions dropdown to Email order details to the customer with payment instructions.

Note that adding an order manually has no effect on stock/inventory. You would need to manually subtract or adjust inventory for those items.
Paying for an Order
Customers can pay for orders assigned to them by logging into the site (if required).
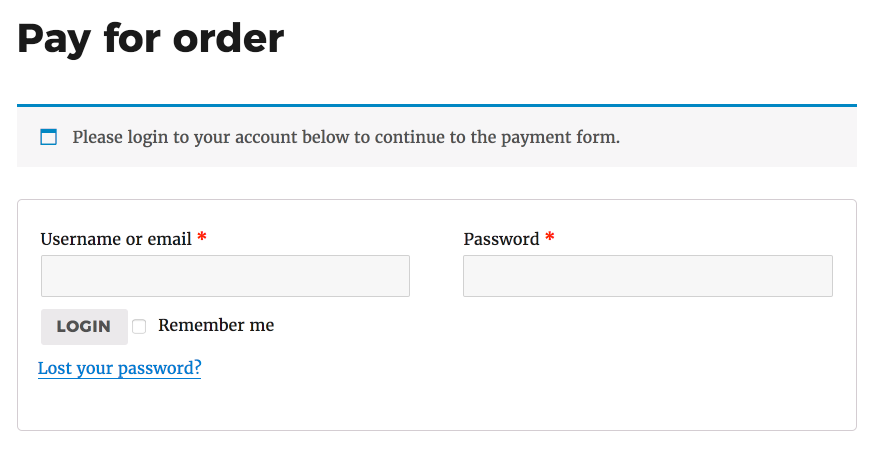
An info message will appear if customers attempt to pay for orders not belonging to them.
Refunding Orders
It is possible to issue refunds directly from WooCommerce if your payment gateway allows it.
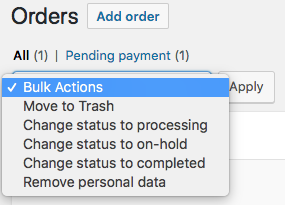
Removing Personal Data
It is also possible to remove customer data. On the Orders screen, under Bulk Actions there is a “Remove personal data” option that will remove the data for the orders selected:
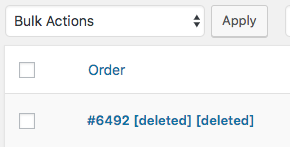
Please note, that once you press Apply this will remove personal data with no further warning. Orders will appear on the Orders screen like this:
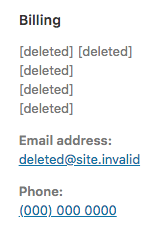
On an individual order, data is updated like this:
- Failed, pending, and canceled orders which get cleaned up will be moved to the trash.
- Completed orders which get cleaned up will be anonymized so sales stats are unaffected (as above).
- Inactive accounts will be deleted. An inactive account is one which has not been logged in to, or which has not placed orders, for the specified time.
This can also automatically be set to be done under WooCommerce > Settings > Accounts & Privacy, in the Account erasure requests section and the Personal data retention section:
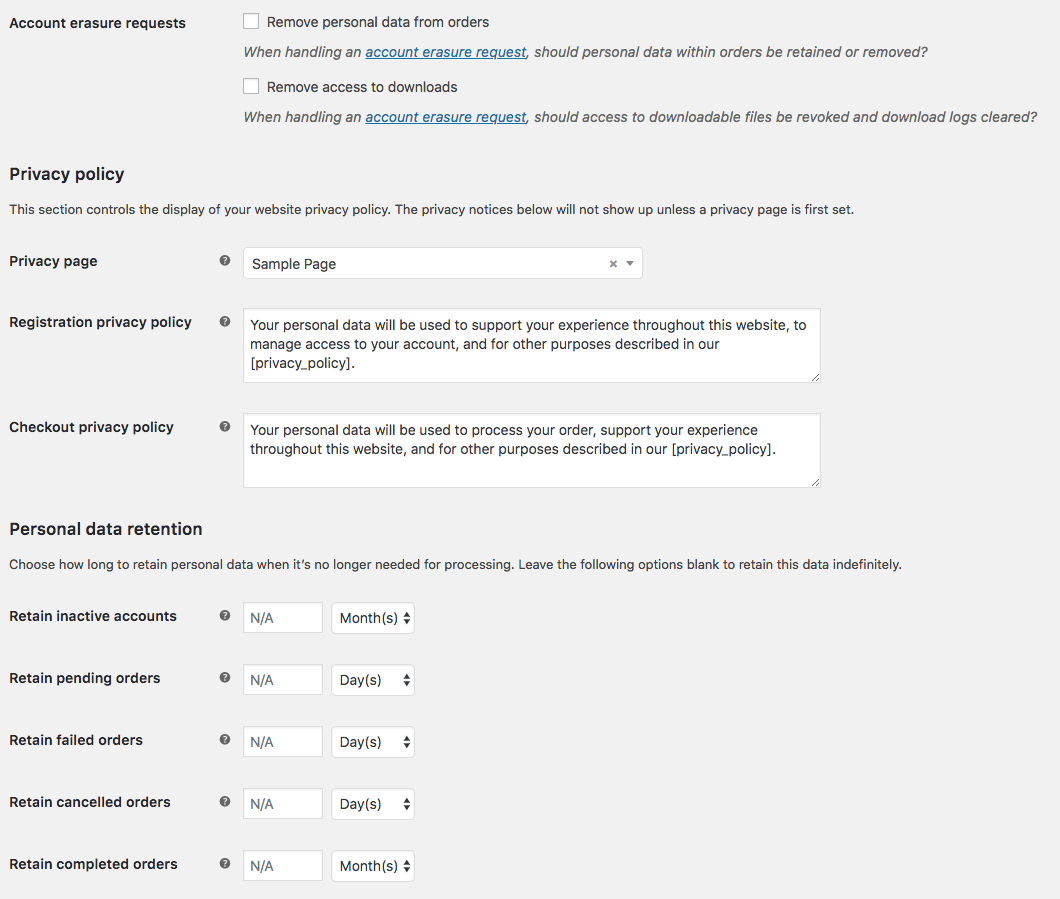
If enabled, this cleanup will run via a daily cron job. Inactive accounts are tracked using meta data, and only subscribers/customer accounts are removed.
Troubleshooting
Understanding Order Statuses in Relation to Payment Gateways
| STATUS | DESCRIPTION | PAYMENT GATEWAY COMMENTS |
|---|---|---|
| ON HOLD | Awaiting payment – stock is reduced, but you need to confirm payment | Usually seen with payment methods when you need to manually confirm, such as BACS (bank transfer) or cheque.You’ll also see this when the gateway is set to authorize instead of capture a charge: the shop owner will need to manually switch the status to processing. |
| PENDING | Order received (unpaid). | Most gateways will report back and set the order status to Processing (payment successful) or Failed (payment unsuccessful). If the shop never receives either signal, it keeps the status on Pending.This tends to be a misconfiguration of payment notification URLs or a plugin conflict. |
| PROCESSING | Payment received and stock has been reduced- the order is awaiting fulfillment. All product orders require processing, except those for Digital/Downloadable products. | If the payment has been successful and the order does not contain Digital or Downloadable products, the order will be set to Processing.This is the shop owner/warehouse’s cue to ship the order and manually mark it as completed. |
| COMPLETED | Order fulfilled and complete – requires no further action | These generally aren’t interesting because everything has gone correctly. |
| FAILED | Payment failed or was declined (unpaid). | The order can be manually cancelled, but this status can come up if the payment window has expired. It can happen for a few reasons:
|