Do you want to add information to your form notifications and other form settings automatically? Smart Tags can save you time by allowing you to include useful details in your forms. In this tutorial, we’ll show you how to use Smart Tags in WPForms.
What is a Smart Tag?
A Smart Tag is a bit of code that you can use to insert relevant information to your form notification settings or as field default values. Smart Tags use curly brackets and look something like this:
{smart_tag}
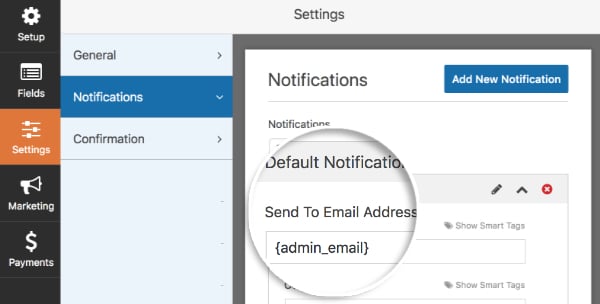
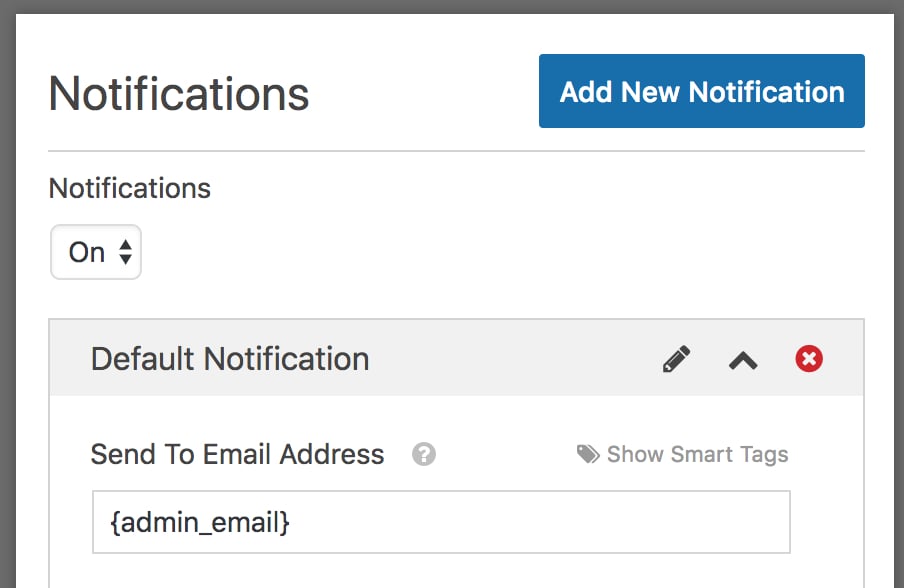
For example, a widely used Smart Tag is {admin_email}, which is the default Smart Tag used in the Send To Email Address field. It automatically fills in the email address of the site administrator.
How to add a Smart Tag?
You can use Smart Tags when configuring notification settings or when setting up fields options in the form builder.
Notification Settings
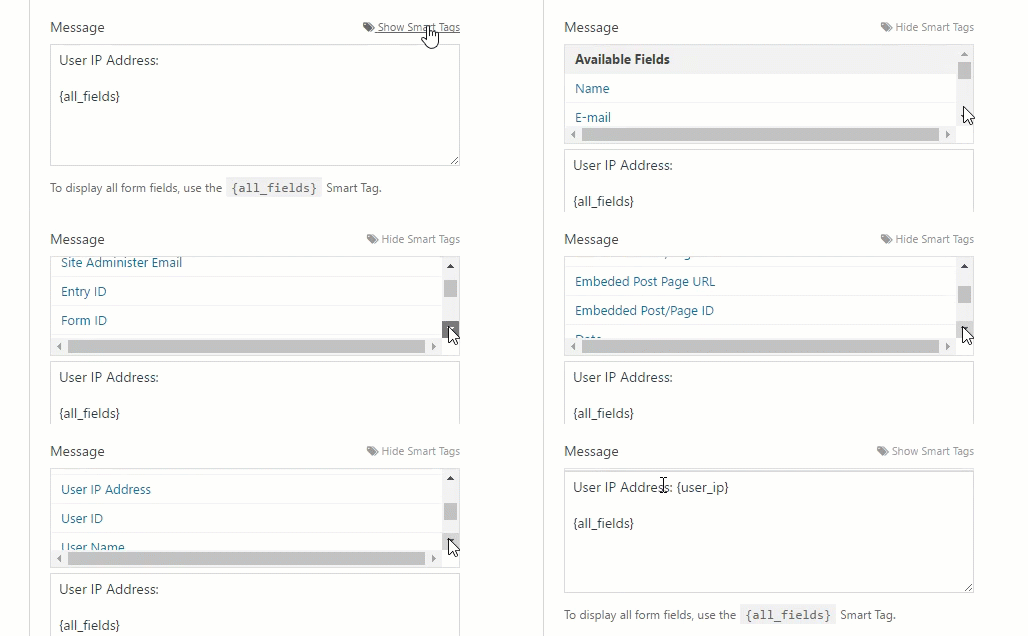
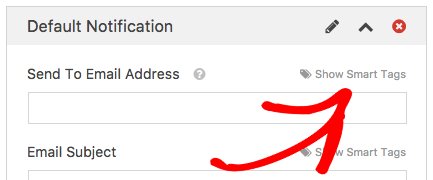
To access the notification settings of your form, in the form builder go to Settings » Notifications. On the top right corner of each field, you can click on the Show Smart Tags option. This will open up a list of Smart Tags that are applicable for a particular field.
To add a Smart Tag to the field, click on its option in the Smart Tag list. When the notification email is received, the information will be added to the email. Here’s an example of adding the User IP Address Smart Tag to the Message field in the notification settings.
Default Field Values
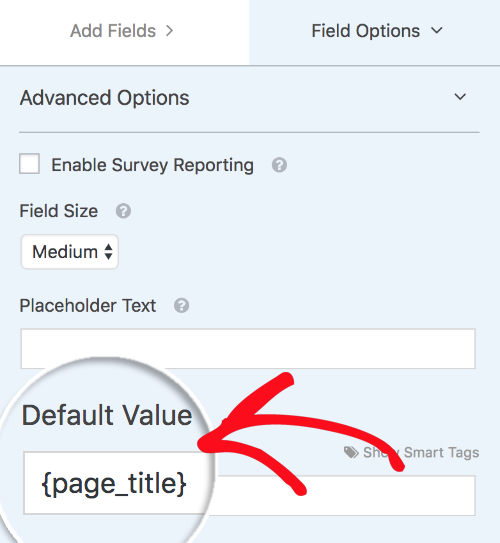
When editing some fields in your form, you can also add Smart Tags as the default value of that field. To do this, in the form builder click on a field to open its Field Options panel. From here, open Advanced Options, where you’ll see the Default Value input. On the top-right corner of that field, click on the Show Smart Tagsoption.
Here’s an example of using the Page Title Smart Tag as a default value of a field.
Smart Tags Available in WPForms
Below is a list of Smart Tags available in WPForms.
- Basic Smart Tags
- Unlock Hidden User Data
- Author Details
- User Management
Basic Smart Tags
Here you’ll find a few basic Smart Tags available in WPForms.
{admin_email}
This Smart Tag will insert the email address of the site administrator.
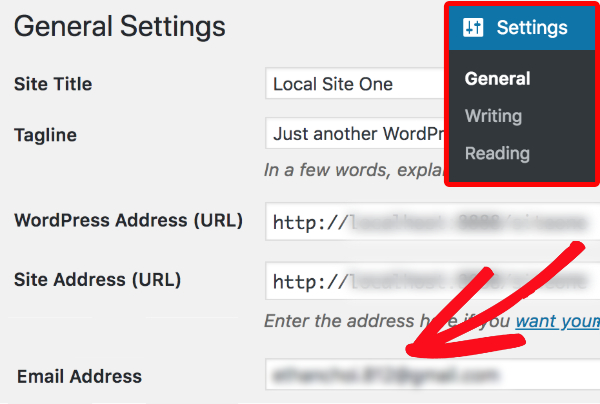
To check your site’s admin email, you can log into your WordPress admin area, go to Settings » General and look to the Email Address field.
How to Use: In your form notification settings, you can add this Smart Tag to the Send To Email Address, From Email, or Reply-To field rather than typing out the site administrator’s email address.
{field_id="#"}
The field ID Smart Tag pulls the value that the user has added or selected to a specific field on your form. It can be found in the notification settings in the form builder, when you click on the Show Smart Tags link.
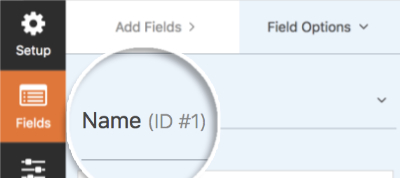
If you’d like to manually create a field-specific Smart Tag, you can replace the symbol # with the ID of a specific field. For example, a field with the ID #1 will have the Smart Tag {field_id=”1″}. In the form builder, you can click on a field in the form preview panel to view its field ID in the Field Options panel.
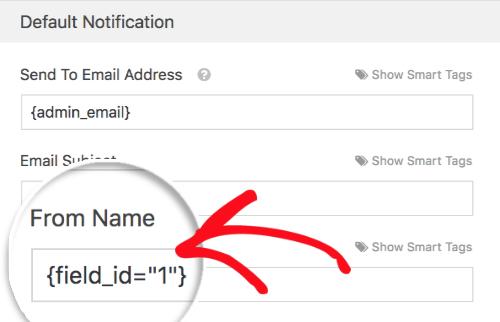
How to Use: You could use this Smart Tag if you’d like to use the user-submitted information in your notification settings. For example, you could add the field Smart Tag for the Name field in the From Name in the notification settings.
{all_fields}
When a form is submitted, this Smart Tag will allow all the submitted information in the form fields to be displayed in the notification email.
If you’d like to see how the notification email looks, check out our guide on how to set up notification emails.
How to Use: By default, form notification settings include this Smart Tag in the Message field to display the entry contents when the notification email is sent.
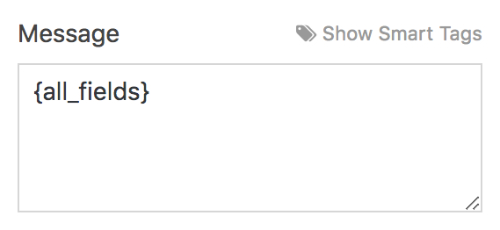
If you’d like to provide more information to the user, you can add details above or below the Smart Tag. You can also remove the Smart Tag so the entry contents are not included.
{entry_id}
When a form is submitted, the entry is assigned an unique ID. The entry ID can found in the Entry Details section when you view an individual entry page of a form.
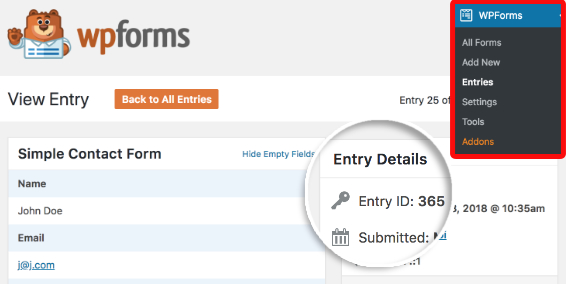
How to Use: As each entry is given an unique ID, the Smart Tag can be useful in tracking entries. For example, you can add the Entry ID Smart Tag to the Email Subject field in your form’s notification settings.
{form_id}
Each form is assigned an unique ID number. This Smart Tag will insert the ID number of the current form.
The ID of a form can be seen in the shortcode of a form, which can be found under the Shortcode column in the Forms Overview page. In the example below, the form has an ID of 598.
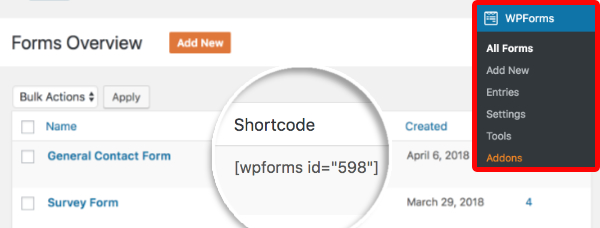
The form shortcode can also be found in the form builder by clicking on the Embed button.

How to Use: By adding the form ID to the Email Subject on your form’s notification, you may find it easier to keep track of which form a user filled out (especially if you have more than one form by the same name).
{form_name}
This Smart Tag will insert the title of your form.
To check or change your form name, open the form builder and go to Settings » General.

How to Use: Adding this tag to the Email Subject on a form’s admin notification can be very helpful when trying to keep your inbox organized and easy to search. It can also be helpful if you send notifications to your users, as it reinforces that their submission for a specific form was successful.
{page_title}
This Smart Tag inserts the title of the page in which the form is embedded.
How to Use: This Smart Tag is most useful when you have embedded the same form on more than one page. By adding it to either the Email Subject or Messageon your admin notification, you can see exactly what page a user was on when they submitted your form.
{page_url}
This Smart Tag inserts the web address (URL) where the form is embedded.
How to Use: Much like the Page Title tag, it can be handy to add this Smart Tag to either the Email Subject or Message on your admin notification when you’ve embedded the same form on several pages. When used in the Message field, the Smart Tag allows you to know which page a specific visitor was using, and to go to that page quickly by clicking on the URL in the notification email received.
{page_id}
Each post or page is given a unique ID in your site. This Smart Tag inserts the page ID where the form is embedded. You can find the page ID in the browser address bar when you’re editing a post or a page. The example below shows a page with the ID 429.
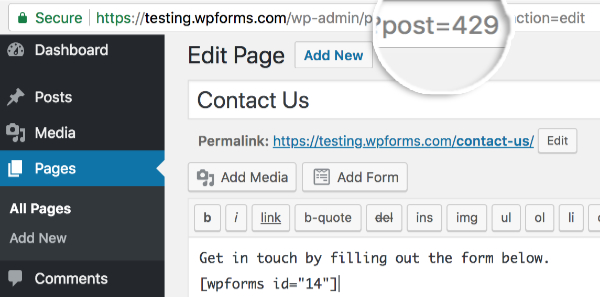
How to Use: Page ID can be useful in the same way as a title or URL, as adding this Smart Tag to an Email Subject or Message on your admin notification will let you know which page a user was on when they submitted a form. Unlike a page’s title or URL, however, the ID associated with a page can never be changed.
{date format="m/d/Y"}
This Smart Tag will tell you the date when the form was submitted.
How to Use: You may find this useful for record-keeping in the Message field of your admin notification (particularly if you might resend a notification sometime after submission, or if the submission date is particularly important).
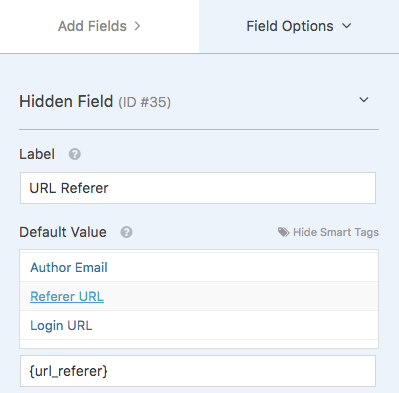
{url_referer}
This Smart Tag will insert the address of the page which referred the user to the page containing the form.
For example, if a user went from your home page to your contact page, and then filled out your form there, this Smart Tag would give you the URL of your home page.
How to Use: You might consider adding this tag to an admin notification’s Message field or in a Hidden Field on your form, which will be invisible to your users but displayed in your entries.
Unlock Hidden User Data
Use these Smart Tags to gather more information of your customers without needing to ask for it in additional fields.
{user_ip}
Each computer on the internet contains a unique address. This tag allows you to see the unique address of each user.
How to Use: If you’d like to know the IP address of anyone who contacts you, you can use this Smart Tag in the Message section of a notification.
{entry_geolocation}
This Smart Tag allows you to see information for the approximate location your user. This requires our Geolocation addon.
How to Use: You can add this Smart Tag to the Message field of a notification as a quick reference for where your user is located, which can be particularly helpful if you need to know their time zone for a phone call.
You can check out our tutorial on how to install and use the Geolocation addon for more details.
{user_id}
Every registered user is assigned an ID number on your WordPress site. This Smart Tag allows you to see the User ID when a form is submitted by a logged in user.
How to Use: If you’re creating a survey form for your logged in users, using this tag can be helpful. It allows you to track unique submissions without you having to ask their name.
{query_var key=""}
This Smart Tag is also known as Query String Variable, and can be used to auto-fill certain fields for your user.
How to Use: Query strings require a little extra set up. You can read our guide on how to use query strings for more details and step-by-step instructions.
Author Details
Learn more details about authors using these Smart Tags.
{author_id}
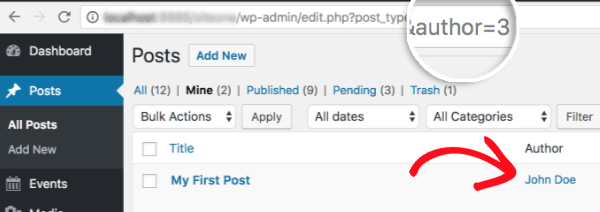
This Smart Tag reveals the ID number of the author for a page or post where a form is located. You can find it by clicking on the name of the author in the Postsor Pages in WordPress and viewing the browser address bar. In this example, the author has an ID of 3.
How to Use: This Smart Tag might be useful to use as a quick record of a post or page author inside the Message of a notification. Note that for some users, their ID and display name might be the same.
{author_display}
This Smart Tag reveals the name of the author of the post/page.
How to Use: This Smart Tag might be useful inside the Message of a notification, especially if different from the Author ID.
{author_email}
This Smart Tag will insert the email address of the post/page author.
How to Use: This Smart Tag is useful if you want the author of the page to receive a notification. The form notification will automatically be sent to the author of the page from which the form was submitted, without having to set up a different form for each page.
User Management
These are some of the most useful Smart Tags for community-powered sites, like forums or membership sites that require users to create an account.
{user_display}
If a user is logged in, this Smart Tag will insert the username of the user.
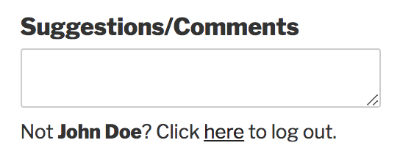
How to Use: This Smart Tag can be added in a description field to display the username of the current logged-in user, so users can check that the correct account is used.
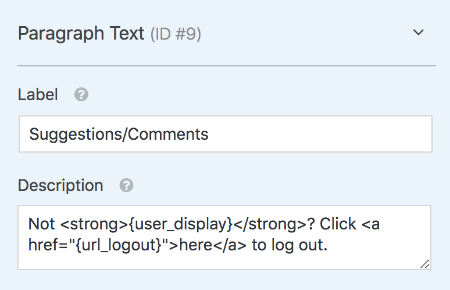
Here’s how it looks on the frontend of the site:
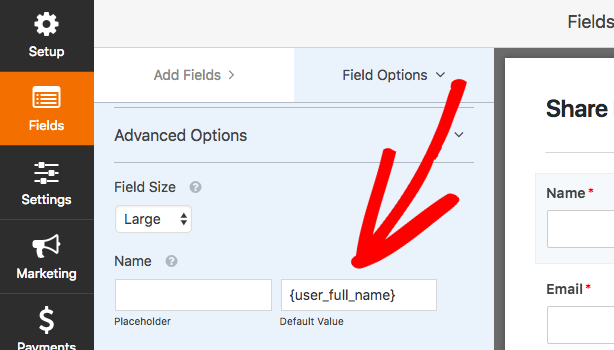
{user_full_name}
If a user is logged in and submits a form, this Smart Tag will insert the first and last name of the user.
How to Use: This tag can be used to auto-fill first and last name on a form for logged-in users.
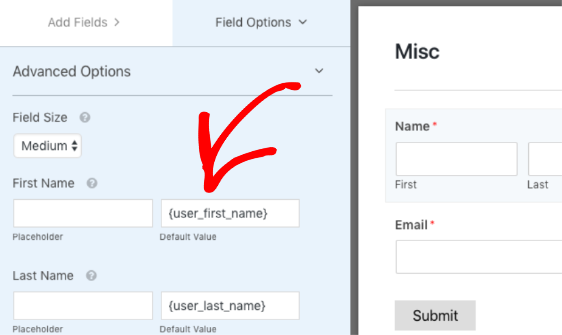
{user_first_name}
If a user is logged in and submits a form, this Smart Tag will insert the first name from their WordPress user profile.
How to Use: This tag can be used to auto-fill the first name of logged-in users.
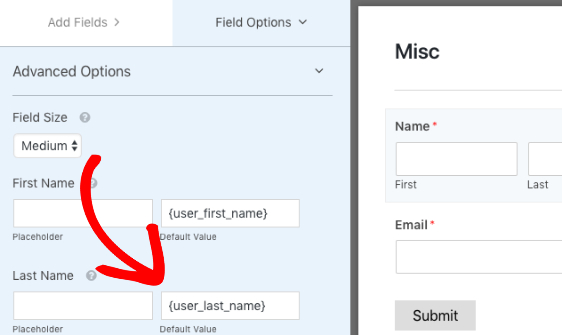
{user_last_name}
If a user is logged in and submits a form, this Smart Tag will insert the last name from their WordPress user profile.
How to Use: This tag can be used to auto-fill the last name of logged-in users.
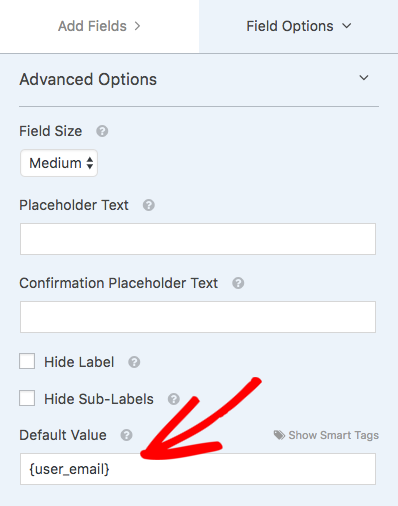
{user_email}
This Smart Tag will insert the email of a logged in user who submits a form.
How to Use: This Smart Tag is a great way to auto-fill a form’s Email field for logged in users.
{url_login}
This Smart Tag inserts the login URL for your site. Your users can go to this web address to log in to your site.
How to Use: If you use our User Registration addon, you might consider using this Smart Tag to provide a login link on your registration form. This can be convenient for users who already registered.
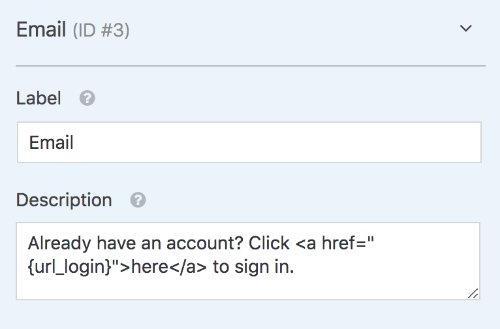
Here’s how it looks on the frontend of the site:

{url_logout}
This Smart Tag inserts the URL your user needs to click on to log out of your site.
How to Use: If users must be logged in to access a form, you might consider adding a link with this Smart Tag to let them log out in case they are accidentally under the wrong account.

Here’s how it looks on the frontend of the site:

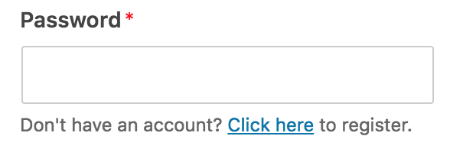
{url_register}
This Smart Tag inserts the WordPress registration URL for your site. If your site allows users to register themselves, this is the web address they’ll need to go to to sign up.
How to Use: If you are using WPForms to customize a login form for your site, this Smart Tag is useful for adding a link to take unregistered users to the default WordPress registration page.
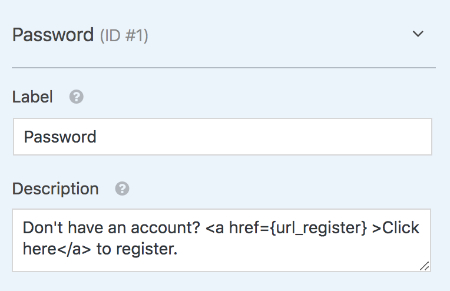
Here’s how it looks on the frontend:
{url_lost_password}
This Smart Tag inserts the lost password link for your site.
How to Use: When a user forgets their password, this Smart Tag provides the address they need to go to reset the password. If you have a login form run by WPForms, you might consider including a reset link in the description area of the Password field.
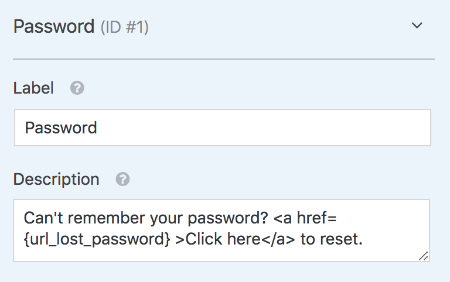
Here’s how it looks on the frontend:

That’s it! You’ve just learnt how to use Smart Tags in WPForms.
Next, do you want display form fields based on user’s input in the fields? Be sure to check out our tutorial on how to use conditional logic in the forms.
