Wondering what you can do with user submitted information? Form entries in WPForms are easily accessible for you to manage and review the information that you need.
In this guide, we’ll discuss all of your questions regarding the file upload feature in WPForms:
- How can form entries be viewed?
- How can the view in the Entries page be customized?
- How can entries be searched and filtered?
- How can entries be exported?
- How can empty entry fields be hidden?
- How can form entries be printed?
- How can entries be more compact for printing?
- How can notes be added to an entry?
- How can all entries be deleted at once?
How can form entries be viewed?
Form entries can be viewed either as a group with other entries from the same form or individually.
Entries Overview Pages
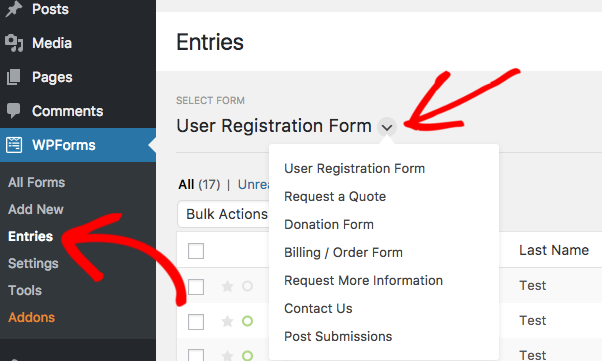
You can access all entries within the WordPress admin area. To do this, hover over the WPForms link in the left sidebar and click on Entries in the popup menu. To navigate to the entries of another form, you can click on arrow icon beside the form title:
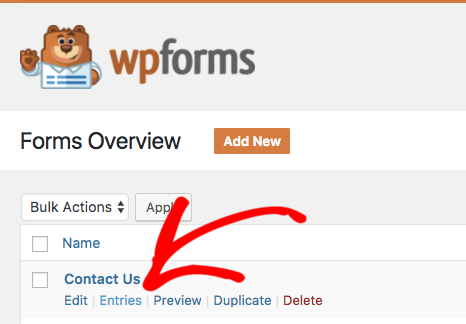
Alternatively, in the Forms Overview page, you can hover over the title of a form to reveal additional options. From here, you can click on Entries to view the form entries:
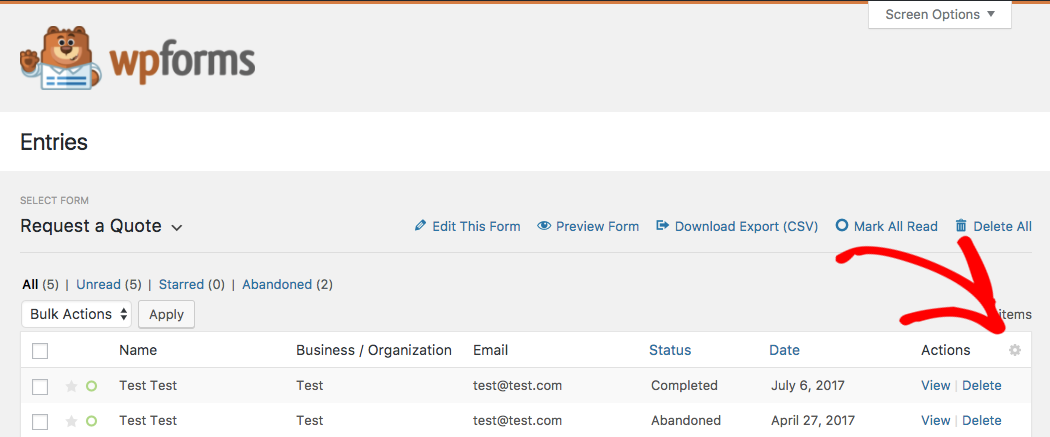
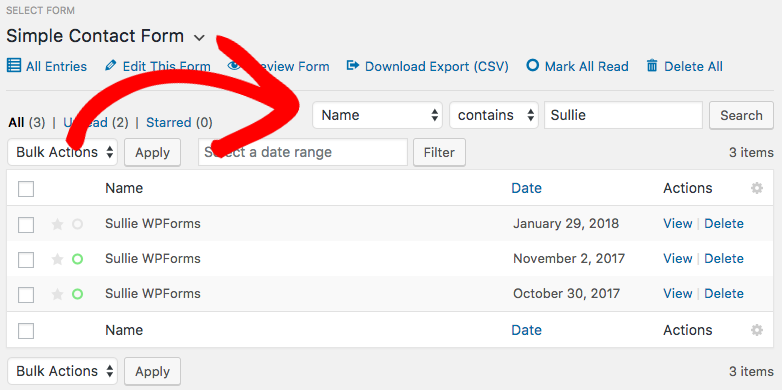
This will take you to the Entries page:
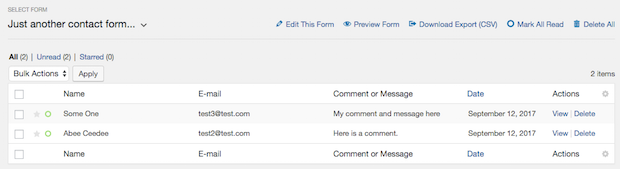
At the top of the Entries page, there are links to useful features you can use (see the blue links in the screenshot above).
- Edit this Form: This option takes you back to the form builder of this specific form.
- Preview Form: This allows you to see how the form looks in the front end of your site.
- Download Export (CSV): This allows you to export form entries as a CSV.
- Mark All Read: Much like marking an email as ‘read’, this will remove the green circle that indicates unread entries.
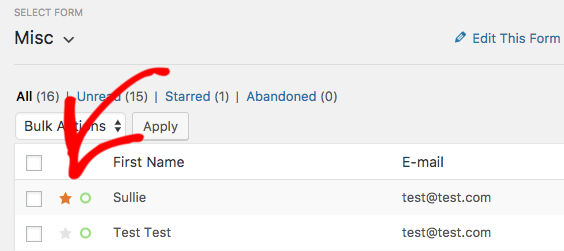
On each entry item you may also click on the View link to see the full content of an individual entry. or use the Delete option to delete an individual entry. You may also ‘star’ important entries for easy reference.
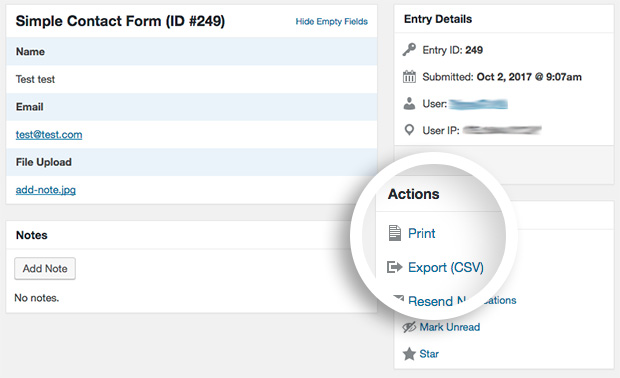
Individual Entry Page
From an individual entry page, you can view a ton of details including all entry details, date of entry submission, and user details if applicable. You can also use actions specifically for this entry, such as printing the entry and resending notification for the entry, according to the form’s notification settings.
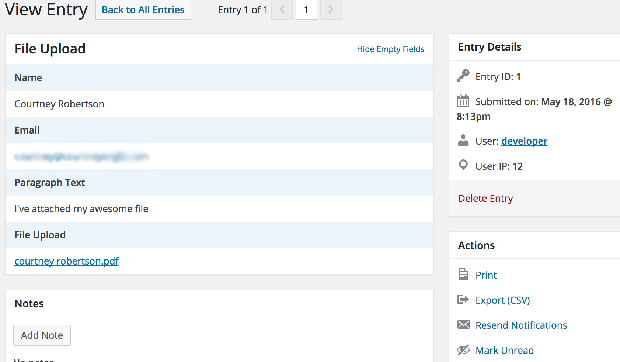
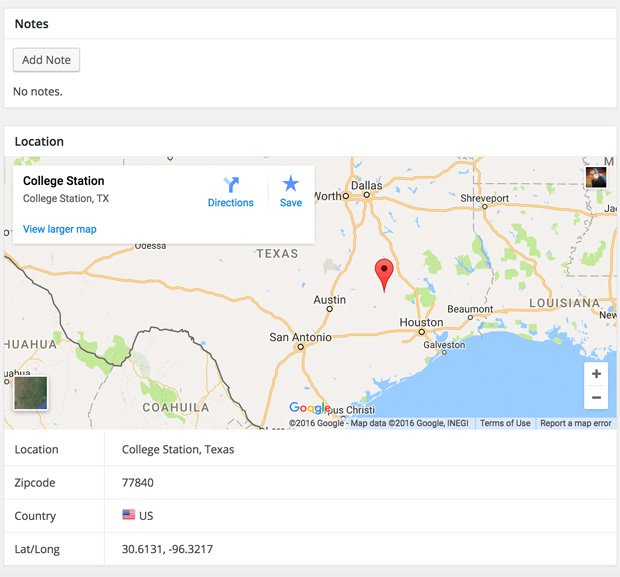
If you have the Geolocation addon installed and activated, you can also view the geolocation data of your users.
How can the view in the Entries page be customized?
You may customize the number of rows and columns in the Entries page according to your preference.
Rows
To customize the number of rows displayed on the Entries page, simply click on the Screen Options tab on the top-right corner of the page.

In the dropdown tab, you can change the number in the Pagination field to your preferred number of entries per page, and then click on the Apply button to save.

Columns
By default, this screen will display the first three fields of your form. By customizing this you can quickly view the most important entry fields of each form.
Simply click on the gear on the top-right corner of the entries.
In the window that pops up, choose the columns you want to display and click Save and Refresh.
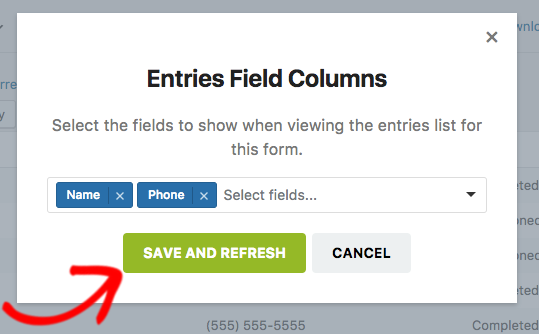
If you’d like more details on how to do this, be sure to check out our tutorial on customizing entries field columns.
How can entries be searched and filtered?
WPForms makes it easy to search entries for keywords or filter by date. To do this, go to WPForms » Entries.
Once you’ve opened the Entries page for the form you’d like, you can add your search and/or date filter requirements.
For more details, please see our tutorial on searching and filtering entries.
How can entries be exported?
You can export the form entries as a CSV file easily in the Entries page of WPForms. The exported file can then be opened with a spreadsheet program like Excel and converted into other formats.
For more details, check out our tutorial on how to export form entries to a CSV.
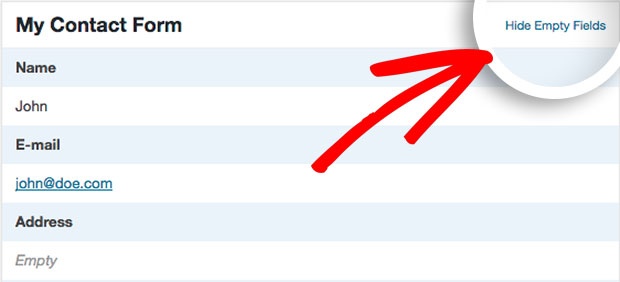
How can empty entry fields be hidden?
If you use smart conditional logic in your forms, or if fields are not set to Required, it is likely that some of the fields in the submitted forms will be empty because they are not relevant to some users.
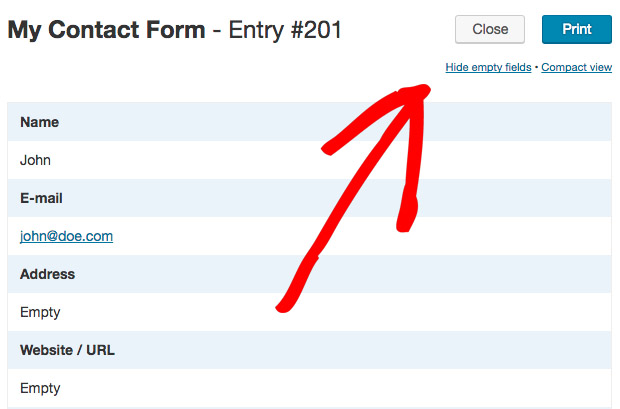
To hide the empty fields when viewing individual entries, click on Hide Empty Fields in the right corner of the entry. To show the empty fields, simply click on the Show Empty Fields link at the same location.
How can form entries be printed?
There are a couple of ways to print form entries. First, you may export the form entries as a CSV and then open and print the CSV in a program like Excel.
Alternatively, you can also print from an individual entry page. Within the Actions in the right sidebar, you’ll be able to select the Print option.
This will bring you to the print preview page. Click on the Print button to print out the entry.
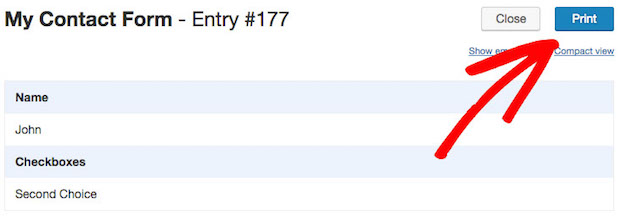
How can entries be more compact for printing?
You may choose between compact view or normal view for printing. Simply click on the Compact view/Normal view link to toggle the print format. There is also the option to hide or show empty fields in the print preview. This also allows you to have a more compact entry for printing.
How can notes be added to an entry?
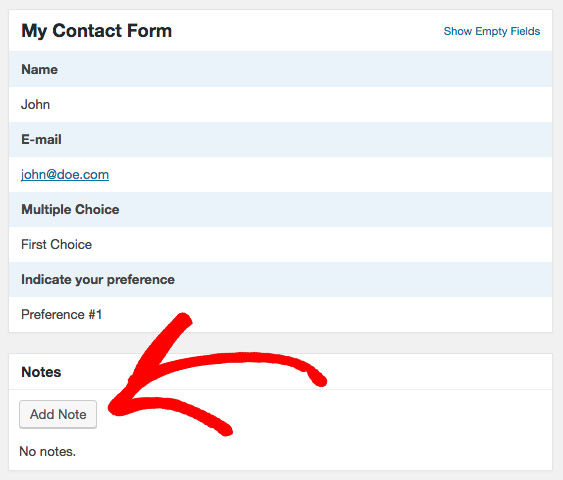
You can include additional information in individual entries after submission with Notes. In the individual entry page, scroll down to Notes section and click on Add Note.
How can all entries be deleted at once?
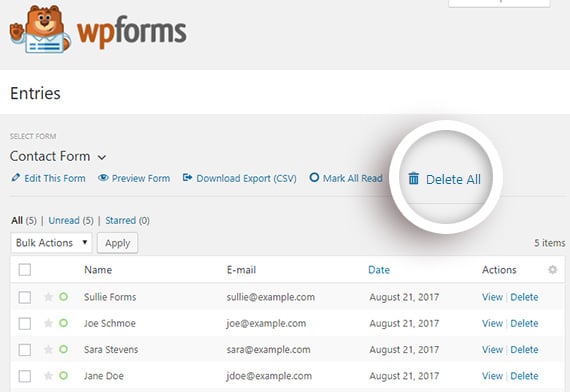
In the Entries page, you can easily delete all entries at once by clicking on the Delete All link.
If you’d like more details, be sure to check out our tutorial on deleting all entries.
You have just learned the different ways to access and review form entries in your website!
Would you also like to send out entry content via email? Be sure to check out our guide on setting up form notifications.